Sparkle Craft: Salamander Pencil Pouch Patch
In “Mr. Salamander“, from the So Many Fairies series, a little girl named Cami is about to start school for the very first time. She does not want to leave her home and magical backyard to go to an unfamiliar place for first grade. As she lays by her backyard frog pond, she meets Mr. Salamander who transforms her apprehension into excitement by telling her a story about a salamander who is quite like herself.
If you have a child who is getting ready to, metaphorically, leave the pond and head into the previously unexplored forest—like the salamander in this story—I must warn you that this sweet tale might make you tear up a little.What’s more, if you happen to be listening to it in the car with one of said burgeoning “salamanders” in the backseat, don’t be surprised if you hear them pipe up at the end, “Hey, mom, can we listen to that again?”
It turns out that our whole family has a lot of feelings about heading off to the forest of first grade.
And what better to way to help work some of that out than with a good, back-to-school art project.
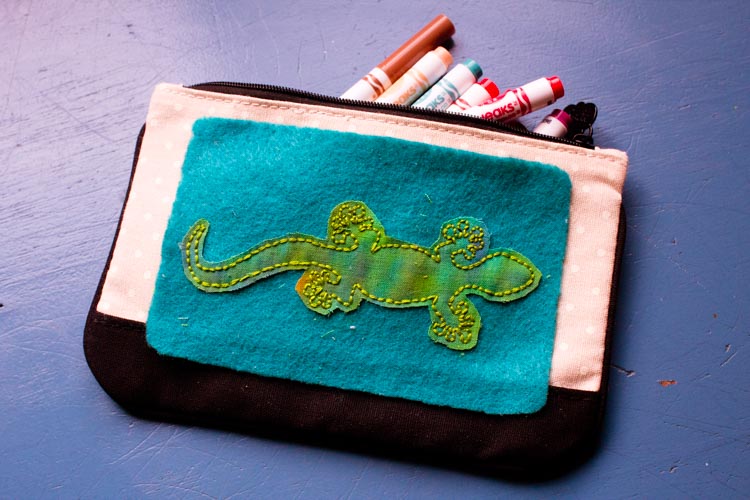
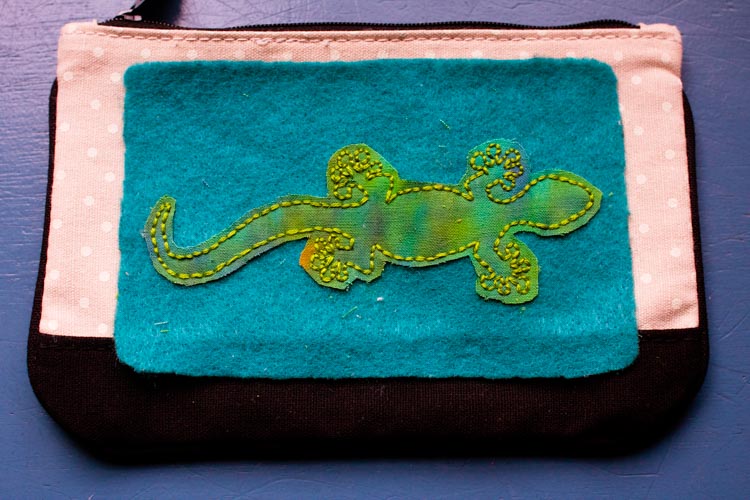
This salamander patch is a great joint project, with the added benefit that it would look cute on any number of shiny new school supplies.Unless your child is already practiced at embroidery, I recommend that they do the painting and you do the stitching.While the resulting patch is just about the perfect size for a pencil pouch, feel free to attach it to a backpack, lunchbox, or any other place where a boost of encouragement might be needed.
Salamander Pencil Pouch Patch
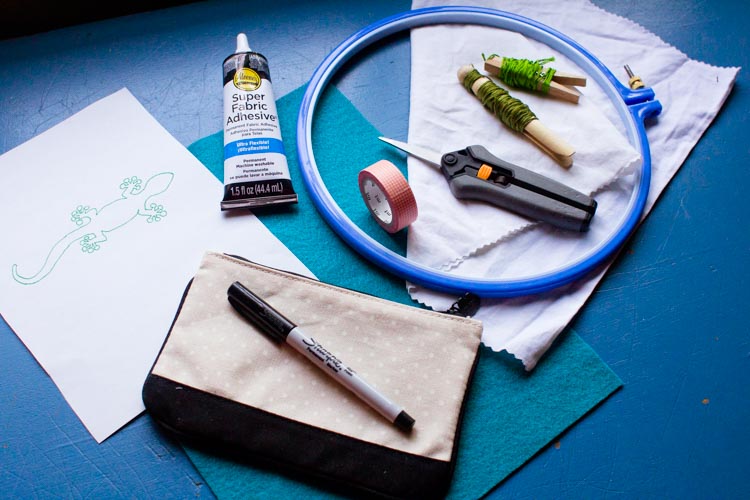
Materials
Scrap of white cotton fabric (about a 12-inch square)
Tape
Thin-pointed sharpie
Paint (washable or not, to suit the object you intend to put the patch on)
1 piece of craft felt
Embroidery hoop
Embroidery floss
Embroidery needle
Sharp scissors
Fabric glue or sewing supplies
Directions
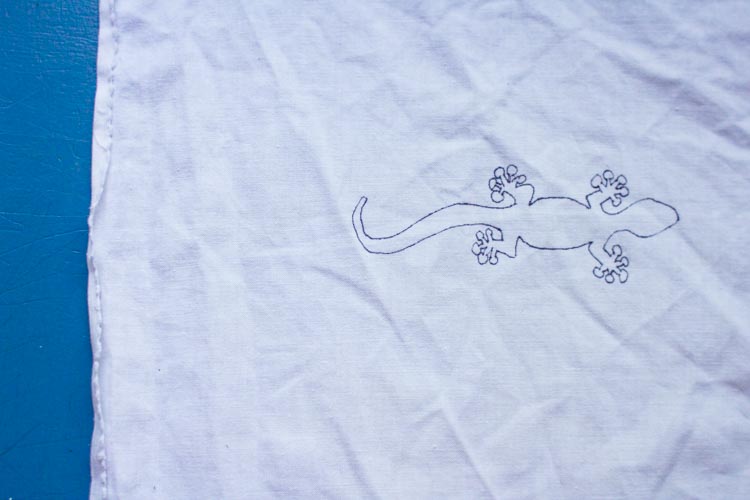
Tape the salamander pattern to a bright window, then tape the white fabric over the top.Use the sharpie to trace the salamander onto the white fabric.
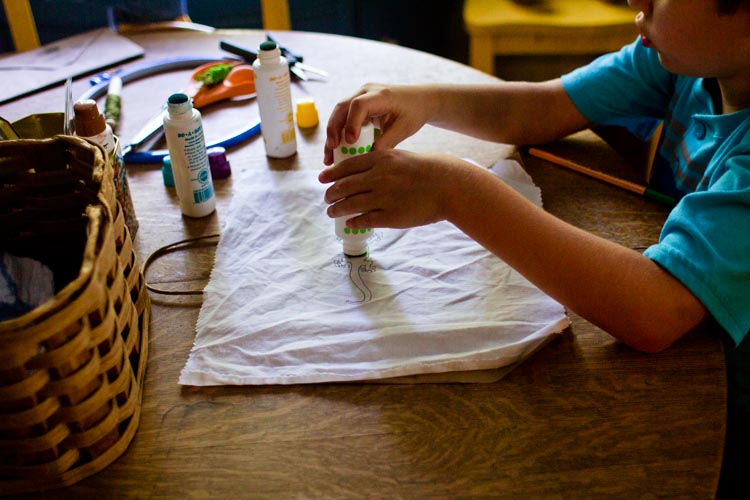
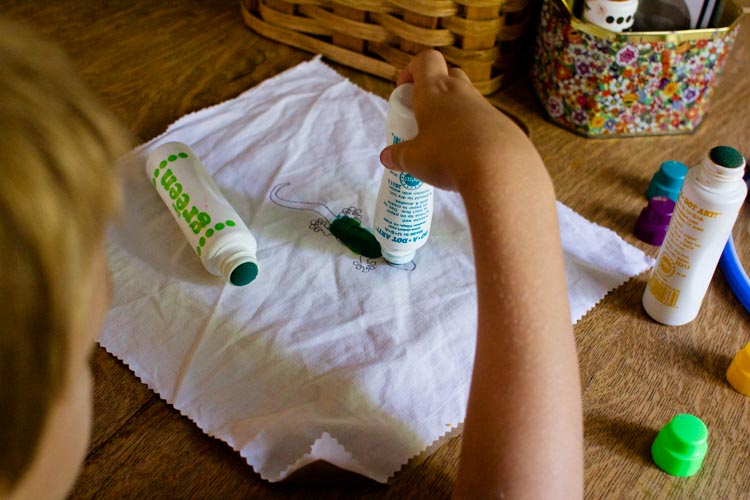
Being sure to protect the surface underneath, lay the white fabric out so that your child can paint the salamander.If you intend to put the patch on an item you might launder, be sure to use paint that won’t wash out.
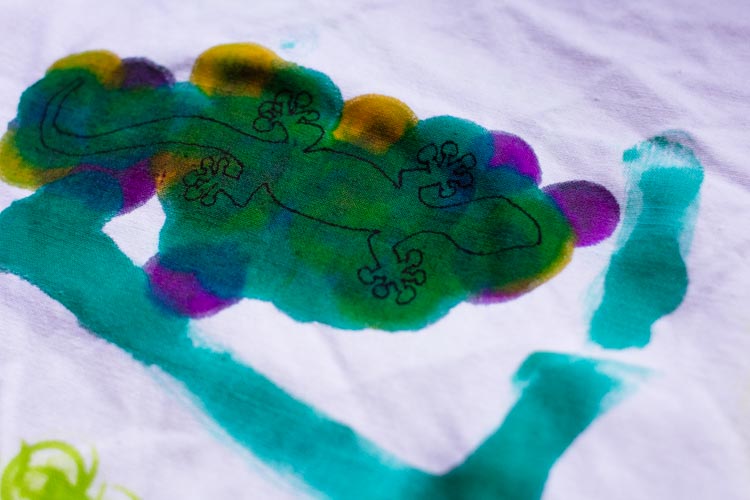
Since I knew I would be using this patch on a pencil case (an item that we typically wear out before it needs washing) we used “dot paints” to make an easy tie-dyed effect.
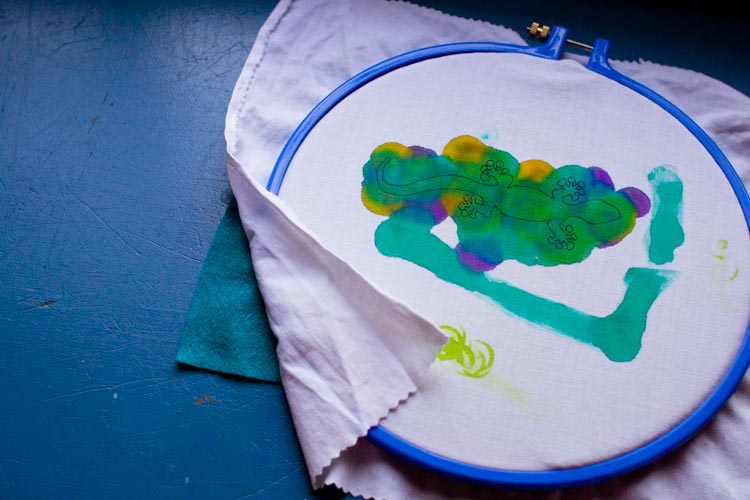
Once the salamander is completely dry, make a stack—craft felt below, white salamander fabric on top—in an embroidery hoop.
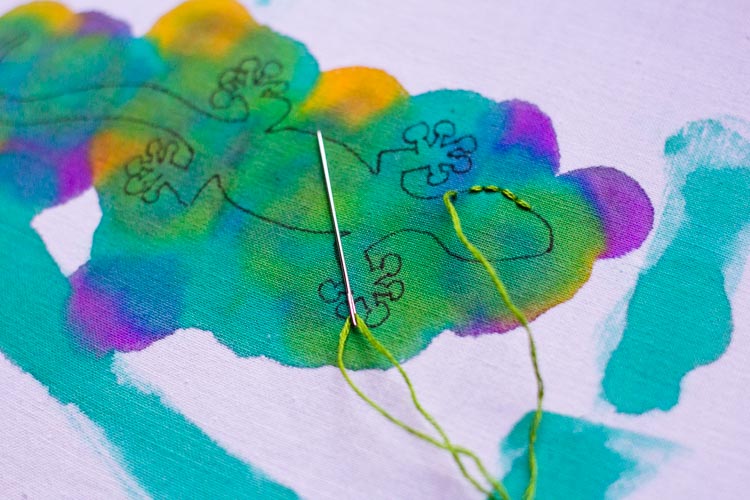
Thread a needle with embroidery floss, then use it to stitch around the outline of the salamander.

Remove the fabric from the embroidery hoop, then use the sharp scissors to clip away the white fabric up to about a quarter of an inch away from the stitches that make up the salamander outline.Be super careful not to cut into the stitches themselves or the felt below; you’ll have to start over if you do, and that’s no fun!
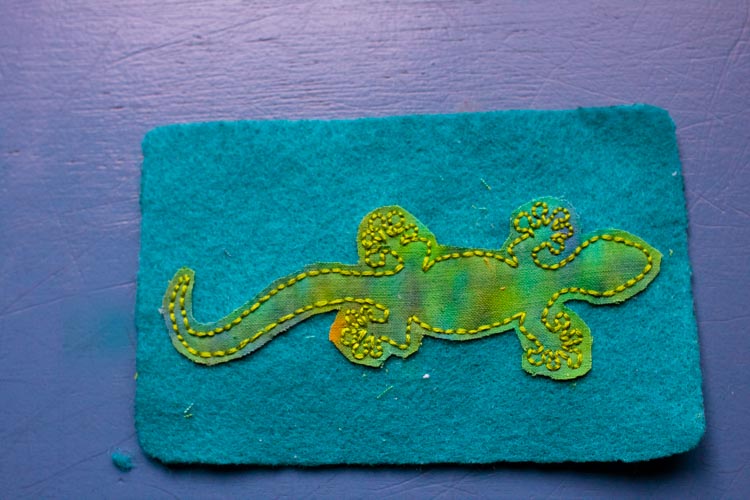
Once the trimming is done, use a straight edge to mark a rectangle (or an oval or whatever shape you want) around the salamander on the felt.Cut the felt on the line you just made, and your patch will be ready to go.

If you’re putting this patch onto a backpack or lunchbox, you may be able to just sew it on if you prefer.On smaller objects, like a pencil case, I recommend using fabric glue, because there’s often not enough room to get your hand inside to make sewing workable.
Either way, I hope your kiddo enjoys this small reminder of all the adventures that can come when you’re brave enough to head out to somewhere new.
If you liked this tutorial, here are other you might enjoy:
Not yet a subscriber? Try a free trial HERE.
About the authors
-

Meryl Carver-Allmond
Sparkle Kitchen & Craft BloggerThe Sparkle Kitchen Series is created by Meryl Carver-Allmond.
Meryl lives in a hundred-year-old house near the prairie with her sweet husband, two preschoolers, one puppy, one gecko, and about ten chickens. While she’s been writing since she could pick up a pen, in recent years she’s discovered the joy of photography, too. She feels lucky to be able to combine those skills, along with a third passion — showing people that cooking for themselves can be healthy and fun — in her Sparkle Kitchen posts.
