Nature School Project: Candle Luminaries
In the Martin & Sylvia’s Nature School story, “Painting the In Between,” one late Autumn morning, everyone is sleepy and slow moving except Daddy. He is excited because it is his favorite time of the year — a time that is in between Autumn and Winter, filled with colors that are in between other colors. This doesn’t make any sense to Sylvia and her friend Sofia — until they actually paint them. And they find that in-between colors are beautiful in a magical way.
We are joined by Rachel Wolf of the Clean. blog, who shares with us her tutorial for candles luminaries that will help bring a bit of the magical in-between glow to your home.
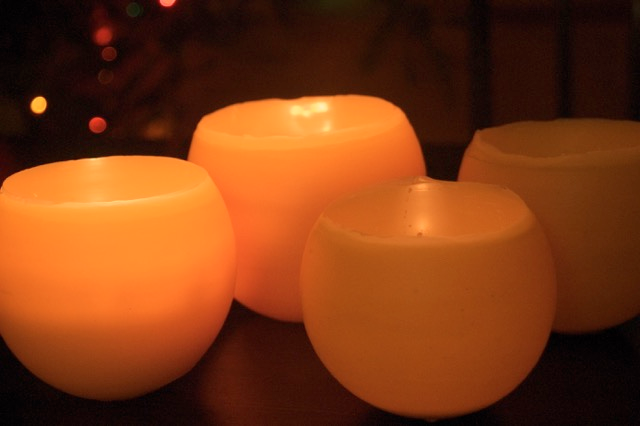
Glowing beeswax luminaries.
Magical? Heck yeah. Add to that easy, affordable, natural, and DIY and that’s my kind of decorating.
Beeswax is warm and sweet and wonderful and when lit, it casts a glow that gives those colors of in-between.
I jotted down a quick tutorial for you. If you have some beeswax and balloons you’re pretty much set.
Candle Luminaries
Materials
9″ balloons
Beeswax (2 lbs or so with plenty left for other projects…)
Double-boiler, slow cooker, or stainless pot devoted to beeswax melting (hit the second hand store for this)
Parchment paper
How to:
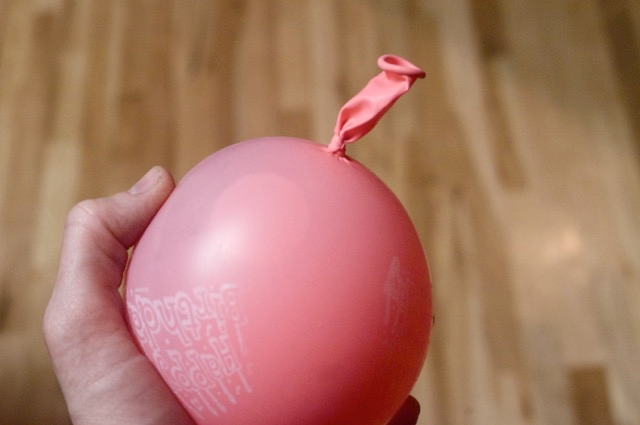
Fill balloons with warm water. Fill them to the size that you want your luminary to be.
Your balloons should be full enough that they are plump/taught. If you want smaller luminaries, simply knot them off as tightly as possible like the balloon above (note the long “tail”). (I say this because I had trouble with under-filled balloon’s. The luminary cracked when I set them down to cool, an issue I did not have with full or tied-with-a-long-tail balloons.)
Heat your beeswax. Ideally you want it around 160-170F. I do this in a slow cooker that I picked up at a thrift store just for this job. If you don’t have a slow cooker you can simply use a cooking pot on low heat or fashion a double boiler out of two pots. (Be prepared to donate the wax pot to wax forever more. Though it is possible – and a bit of a headache – to clean out.)
Melt the wax on high, then turn it to low before you set to work. I only checked the temp twice during a 40 minutes of luminary making and it held temp well. No thermometer? No worries.
Troubleshooting Temperature
If you don’t have a thermometer, wing it. Here’s how you know you have the right temp:
Is the wax sticking smoothly to your balloon? Then it’s your temp is good! Dip.
Is the wax lumpy? Too cool! Heat it up.
Is the wax melting the previous layer off when you re-dip? Too hot! Allow to cool.
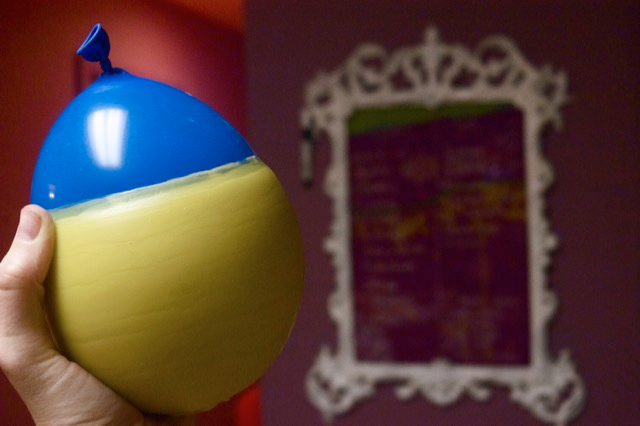
Dip your balloon repeatedly. Do not dip beyond the water/air line on your balloon. If you wonder why and decide to try it your balloon will dramatically explode, filling your wax pot with water and causing you much grief. (Ask me how I know…)
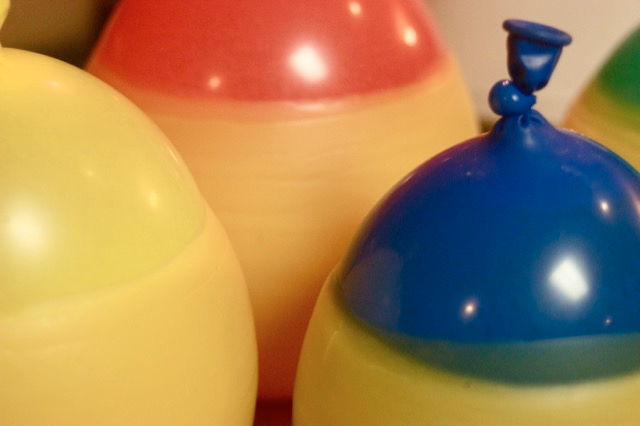
Every six dips or so gently place the balloon on a piece of parchment paper to flatten the bottom. Let it sit for a bit to cool. Between every dip allow 5-10 seconds for the wax to cool before you immerse it in the wax another time. (I like to do two balloons at a time, alternating between them.)

After approximately 20-30 dips, gently place your balloon on the parchment and allow to cool. Your goal is a luminary that is thick enough to hold up to use, yet thin enough to let the light through. Once it feels firm to the touch (though still warm) take your balloon to the sink and pop it! It will startle you every time. I promise. And you will likely get a little wet if your aim is off. Peel away and discard the balloon.
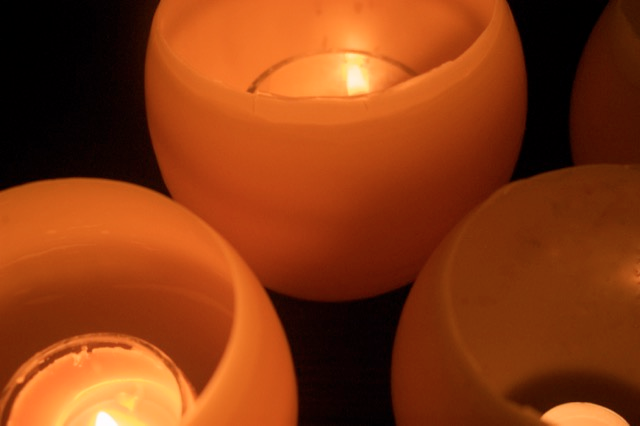
Trim any ragged edges with a pair of sharp scissors while the luminary is still warm. Then place a tea light or votive in a cup inside and enjoy. (The brighter your candle the warmer the glow.)
If you enjoyed this post here are others you might like:
About the authors
-

Rachel Wolf
Blog ContributorHomeschooling mother of two, owner of [LuSa Organics](http://www.lusaorganics.com/), writer and crafty gal. You’ll find her [blogging](http://lusaorganics.typepad.com/) about peaceful parenting, simplicity, homeschooling, food preservation, and crafting of all sorts.
