Nature School Project: Wrappings
In this Martin & Sylvia Nature School, “Wrappings” story, Brother and sister wake to an ice storm and wonder if Goose-eye Wilderness School will be cancelled. Sylvia hopes so because she loves the idea of having her brother experience her school. But when Martin does end of going to Wilderness school, he has mixed feelings about it. Luckily Helmut, the substitute apprentice for this week, offers a picture of feelings that is exactly how Martin feels – and he realizes he is missing his sister.
(This post was orginally seen on our contributor blog Mud Puddles to Meteors. It was written and photographed by Natalie Kramer.)

Make your own nature motif gift wrap paper:
The key? Get some nice leaves and flowers from the garden and use the copy-mode from your All-In-One-Printer, that’s all.
What You Need
• Plants from the November-Garden: fern, grass, daisy, hawkweed, barberry
• All-In-One-Printer
• Copy Paper A4, white
• Optional: Picture-Software
Note: Branches with small leaves, long grass, fern and flowers work well. If you use them fresh, like i did, you may tape a paper to the lid for protection. Don’t use berries. Don’t forget to clean the glass afterwards!

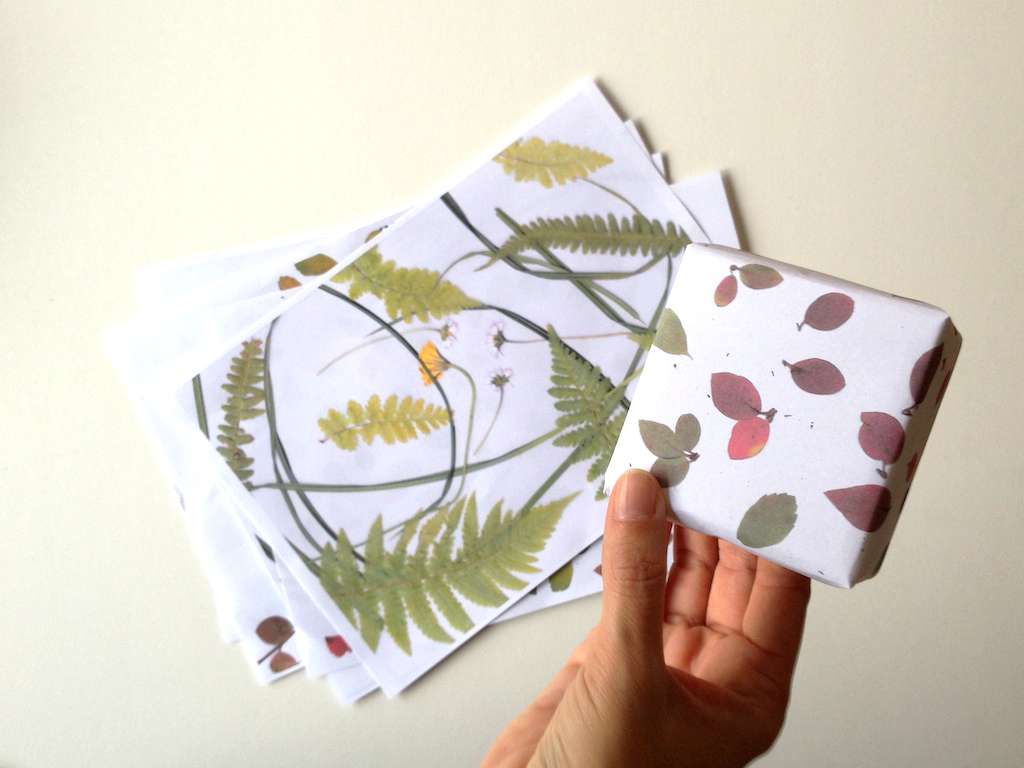
Sprinkle the barberry, or other leaves you have collected, on the glass from your printer, put down the lid and press the copy-button. You’ve got your first gift-wrap paper! If you like it, best to make a scan from it and store it on your hard-drive for an other occasion.
For the wrap it’s best to have an interesting bit in the middle of the paper. If you’re not sure how much you should put together, use the preview-function on your computer and have a look. If necessary remove or add more plants.

You can also use photo editing software to help clean up the result. In the photo above I used bright and bark-correction in the upper part.
The original copy is good, but if you’ve got photo software, you can make the print even better.
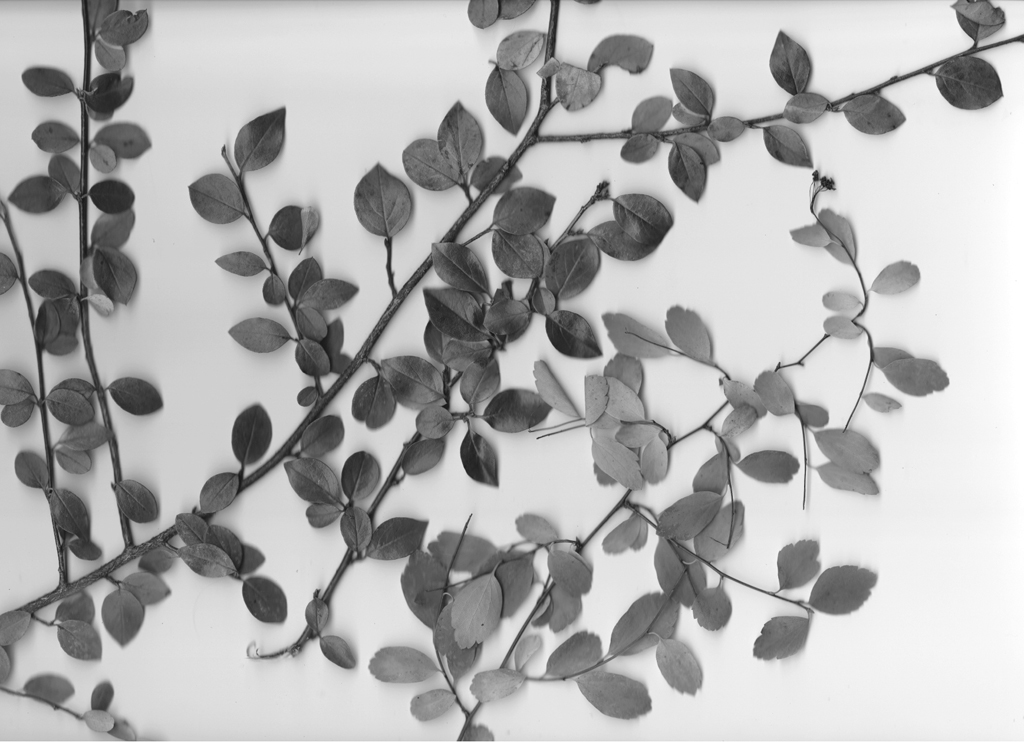
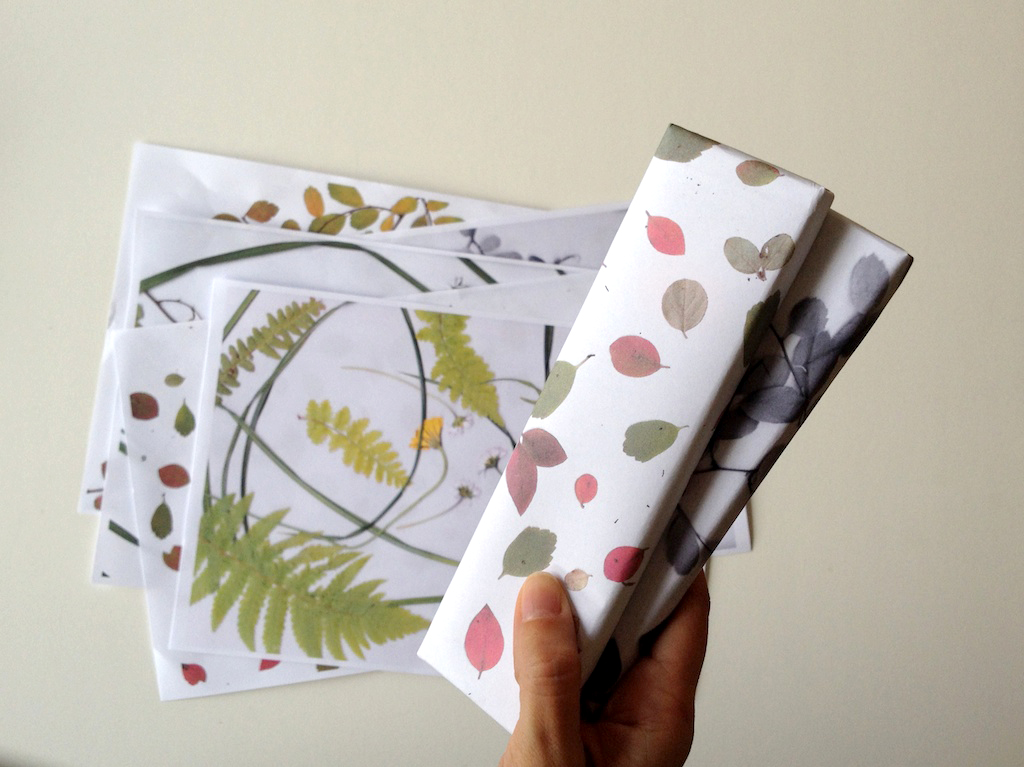
Another option is to copy the branch only with black and white.
You can start to wrap your smaller parcels with your paper. From these november plants I made 6 different papers in half an hour.
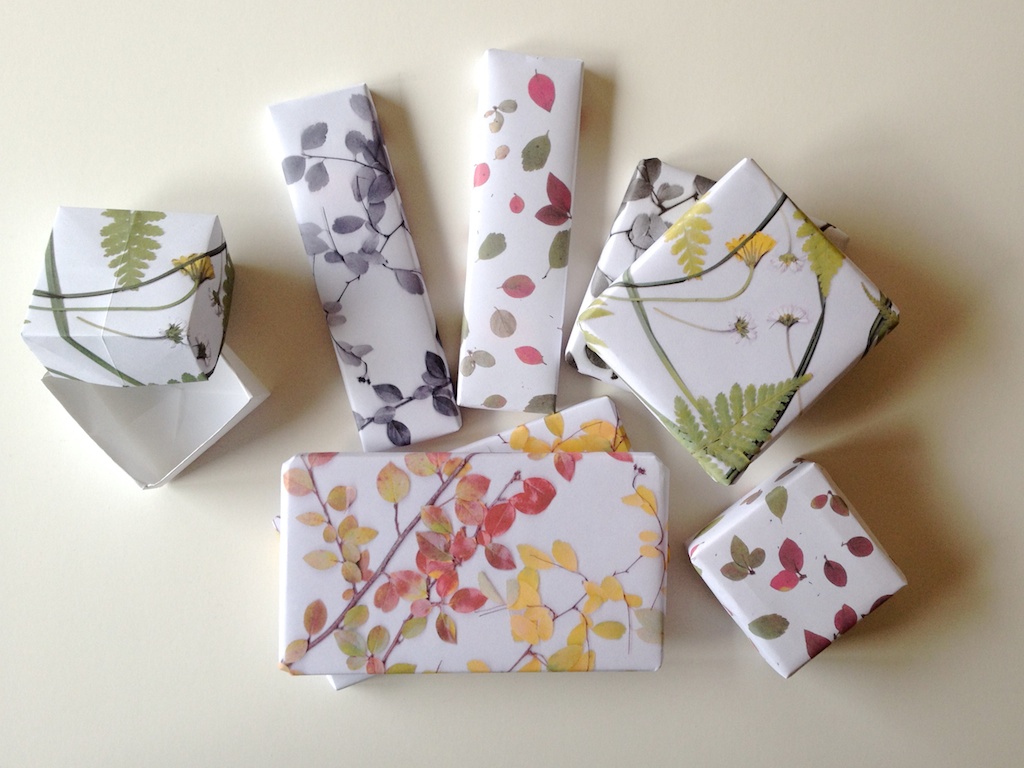
You can also fold an easy origami box, called masu, with the paper (left, in the picture). Use the plant-print for the top and a white or colored one for the bottom. Find video-tutorials by searching for it on the internet: origami, box, masu.
