Flower Pot Fairy House: Make Your Own!
In the Martin & Sylvia: Saturdays! story “Spring Seeing,” brother and sister take themselves on a “spring seeing walk” where they hunt for signs of spring. As they wander through the forest, they talk about the fairy life. Sylvia wonders if maybe this time she can see a fairy with her own eyes.

Amidst the animal tracks, fallen sticks, and bird feathers that the children discover, Sylvia sees a real fairy house in a hole near the base of a tree. While Sylvia can’t remember ever seeing a fairy, she knows that regular eyes can’t see everything. Sometimes you have to use your imagination to see magical things.
While imagination is a beautiful lens all on its own, sometimes it can be fun to coax our imaginations along with a more solid prop.
Which is to say that, if you want to see fairies in your own woods or garden, consider encouraging your imaginative eyesight with one of these tiny, flower pot fairy houses.
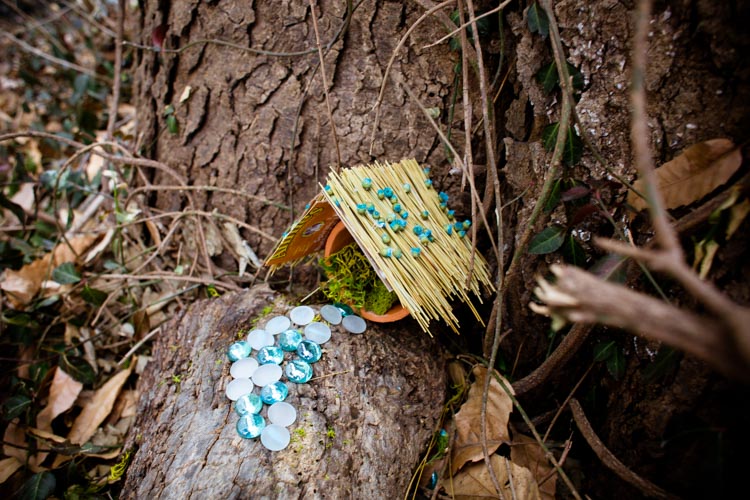
If you’re in a warmer climate, you can adapt this project to materials you find outside, but — as my backyard was still very much in winter mode when I was building this fairy house — I used dried flowers from the craft store to make the roof and sea glass pebbles to give my house a stable foundation. I wanted to leave my house outside to decompose naturally, so I was careful to select materials that would eventually absorb back into nature.
To that same end, a word on glue. If you use white glue or Mod Podge, you’ll need to plan to work on this house a little at a time over several hours to give the glue time to dry. Hot glue makes the process much faster, but, since it’s basically plastic, I wanted to use as little as possible. (I ended up using white glue on the roof, and just a few dots of hot glue to attach the roof to the flower pot.)
Whatever materials you use and whenever spring comes for you, enjoy making a few of these fairy houses to let your local fairies know that your imagination is wide open to them.
Flower Pot Fairy House
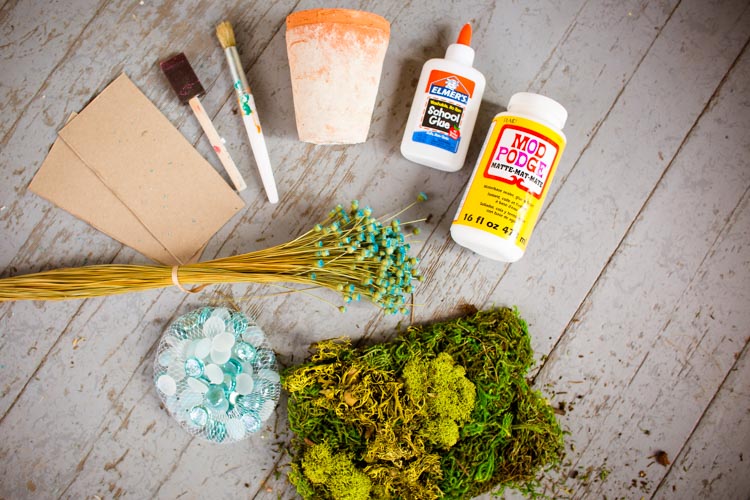
Materials
2 small pieces of cardboard (the large sides of a mac’n’cheese box work perfectly)
1 bunch dried flowers with long, woody stems and small blossoms
Glue, Mod Podge, or hot glue
Paintbrush (for spreading glue)
Scissors
Small flower pot
Moss
Sea glass pebbles
Directions
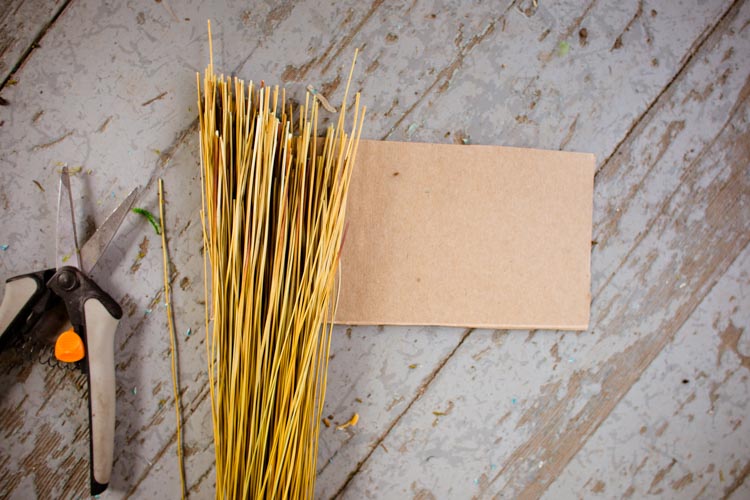
Using one of the pieces of cardboard as a guide, cut the bottom of the stems off the bunch of flowers. You’ll want the resulting sticks to be just a bit longer than the shorter dimension of the piece of cardboard.

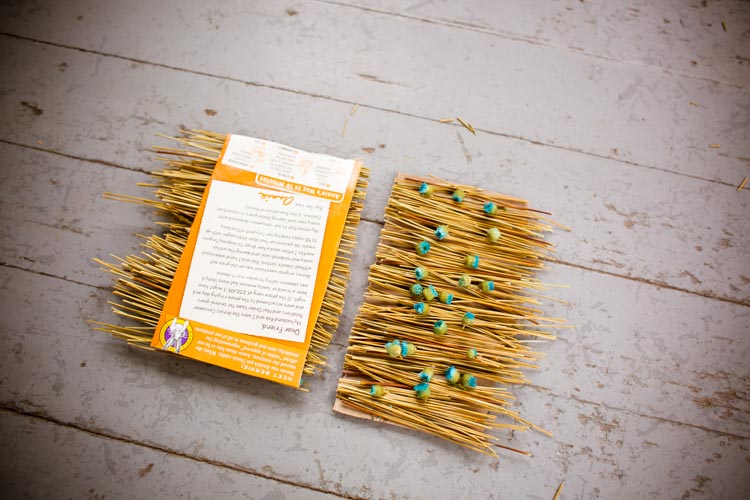
Next, generously slather glue onto the brown side of the cardboard and press the newly trimmed sticks into the glue to make a thatched “roof” panel. Repeat the process with the other piece of cardboard.
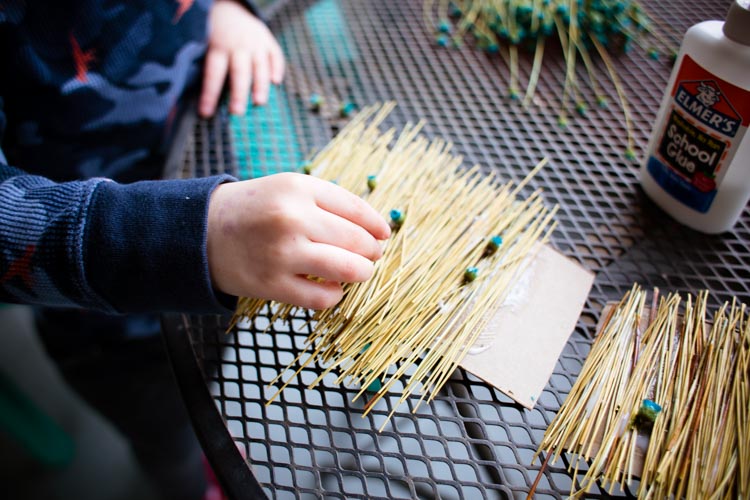
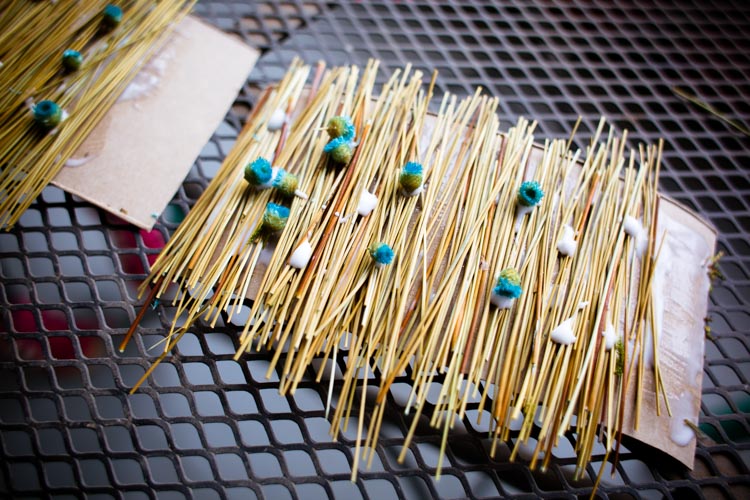
While the glue is still wet (adding additional glue as needed), break the blossoms off the flowers and randomly stick them to your new roof to decorate it. Leave the two roof pieces to dry for a few hours.
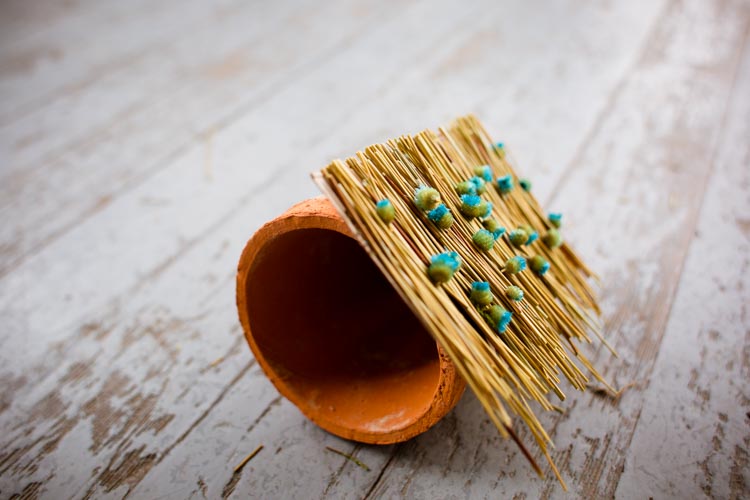
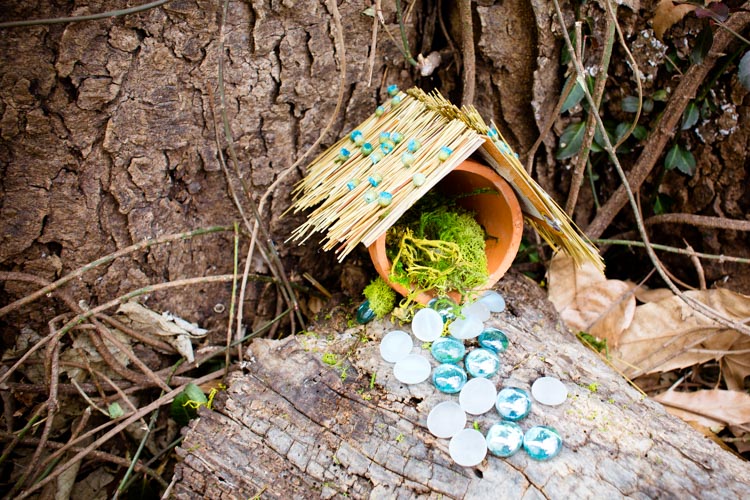
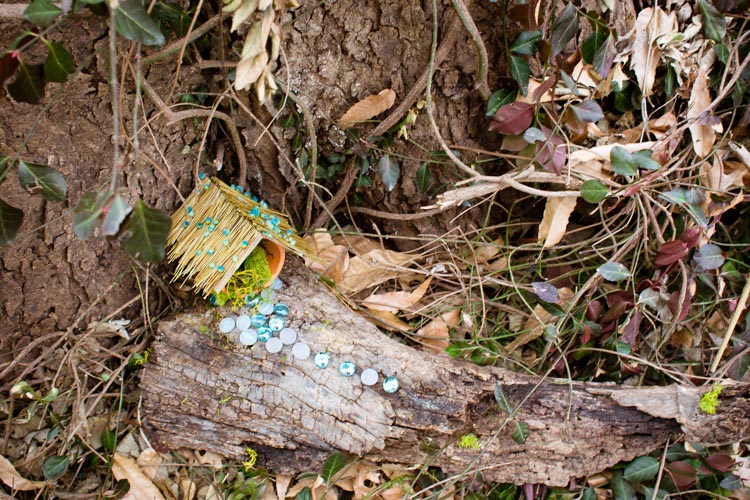
When the roof is dry, trim up the sticks so that they’re nice and even. Holding the pot horizontally, glue the roof pieces to the outside of the pot, angling them so they meet to form a peak. Again, let the glue dry.

Now, figure out where you want to put your fairy house and spread a handful of sea glass pebbles to make a stable foundation that will keep the pot from rolling. Tuck tufts of moss inside the pot to make a soft fairy bed. Place any extra pebbles in front of the fairy house to make a sparkly front porch.
Last, keep a good lookout — with such a cozy, sweet home, it won’t be long before fairies start moving in!
If you liked this tutorial, here are others you might enjoy:
Not yet a subscriber? Try a free trial HERE.
About the authors
-

Meryl Carver-Allmond
Sparkle Kitchen & Craft BloggerThe Sparkle Kitchen Series is created by Meryl Carver-Allmond.
Meryl lives in a hundred-year-old house near the prairie with her sweet husband, two preschoolers, one puppy, one gecko, and about ten chickens. While she’s been writing since she could pick up a pen, in recent years she’s discovered the joy of photography, too. She feels lucky to be able to combine those skills, along with a third passion — showing people that cooking for themselves can be healthy and fun — in her Sparkle Kitchen posts.
