Craft Your Own Personalized Hiking Stick
In the Martin & Sylvia story “The Cabin,” Martin and Sylvia’s friends have a mountain cabin in the woods and the whole family is invited to join them for a weekend of blackberry picking!
Everyone is excited to hike the many trails to the lake and waterfall — except Sylvia. Sylvia is tired. Sylvia’s feet hurt. Sylvia would rather stay at the cabin and play games. But when Momma teaches her how to have “fox feet” and “deer ears,” Sylvia suddenly finds the woods full of possibilities and, indeed, animals.
Even with kids who are usually excited to be outside, I think it’s a fairly universal truth that — someday, sometime, somewhere — everyone gets a little whiney on a hike.
Another thing that’s a universal truth is that kids love sticks. I haven’t met a child yet who can resist picking one up, and for good reason — they’re great for swinging, poking things, and generally exploring the world.
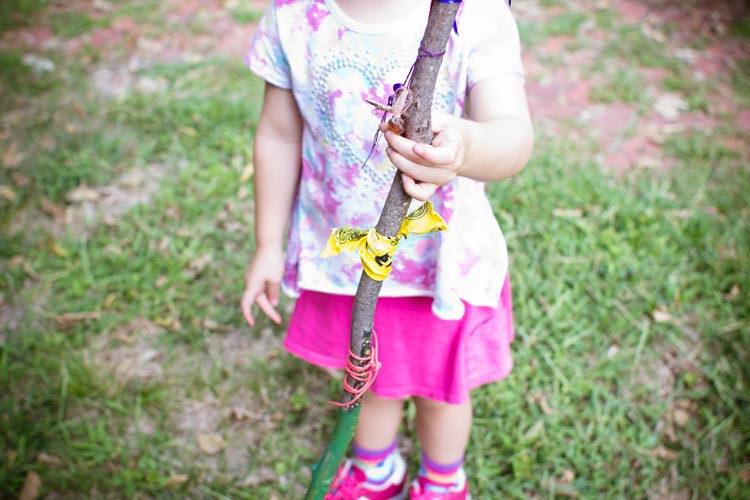
This week’s craft project uses the second universal truth to combat the first, and it will hopefully get your kids excited to go on some adventurous fall hikes with their bright, new, personalized hiking sticks.

Do you need even more motivation? Well then, it’s a great way to use up the odds and ends in your craft supply cabinet, too!
I’ve set out a list of material ideas below, but this is the ultimate project to creatively use what you have. Toss it all out on a work surface that can get good and messy, grab some sticks from the backyard, and let your kids go wild. They’ll be ready to go for a walk before the paint is dry!
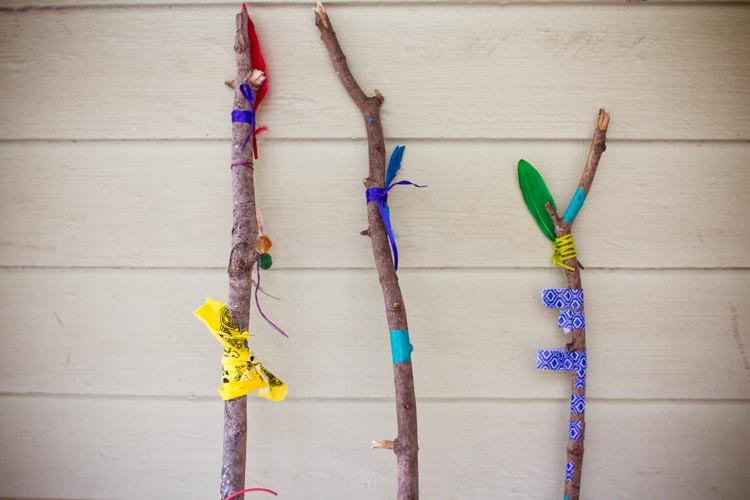
Personalized Hiking Sticks
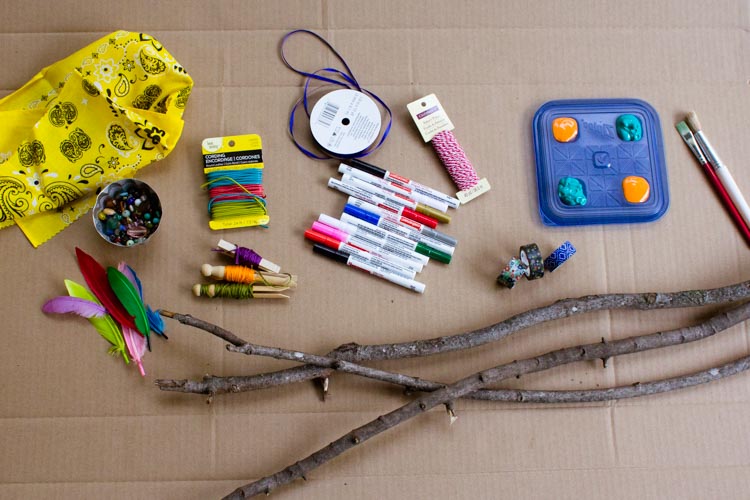
Materials
1 stick per person (we used sticks about 3 feet long, which is a nice length for swinging and poking) scissors
Any combination of the following:
paint and paint brushes
paint pens
markers
crayons
ribbon
baker’s twine
embroidery floss
washi tape
feathers
leather cord
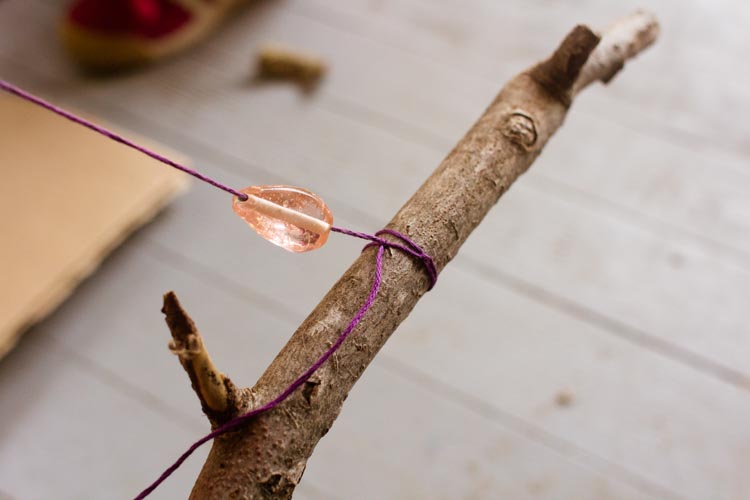
beads and a needle for stringing them
fabric scraps
Directions
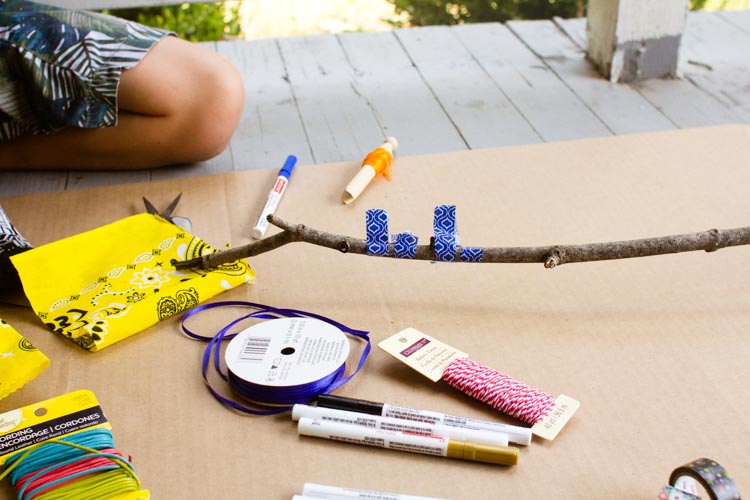
Beyond “find a stick” and “make it beautiful,” this project has very little in the way of “must do” steps. However, here are a few gentle guidelines that will help make this very open-ended art project flow better:
- Paint last! Once there is paint on your stick it’s very hard to do anything else without the paint getting everywhere. Leave room for the paint between the other elements, but add everything else first.

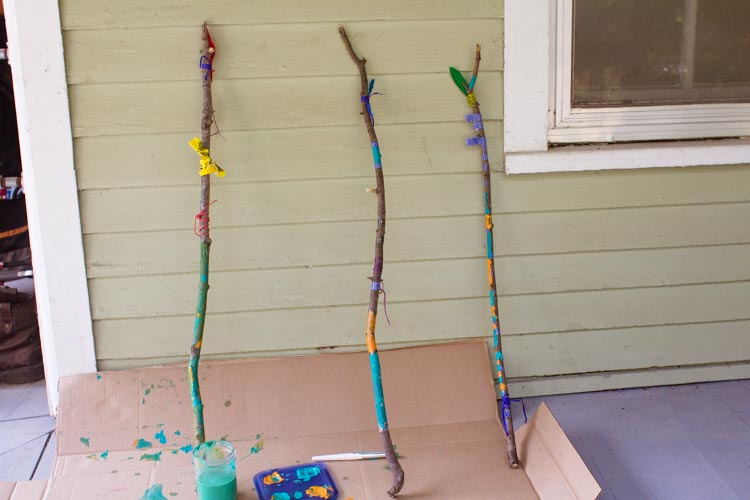
Once your sticks are finished, prop them up to dry in a safe place, then prop them by your door to be at-the-ready for fall adventures.
If you liked this tutorial, here are others you might enjoy:
Not yet a subscriber? Try a free trial HERE.
About the authors
-

Meryl Carver-Allmond
Sparkle Kitchen & Craft BloggerThe Sparkle Kitchen Series is created by Meryl Carver-Allmond.
Meryl lives in a hundred-year-old house near the prairie with her sweet husband, two preschoolers, one puppy, one gecko, and about ten chickens. While she’s been writing since she could pick up a pen, in recent years she’s discovered the joy of photography, too. She feels lucky to be able to combine those skills, along with a third passion — showing people that cooking for themselves can be healthy and fun — in her Sparkle Kitchen posts.
