Sparkle Craft: Sock Bunny
In the At Home with Martin & Sylvia story “Trash Fairies,” one dark and stormy night Martin decides to cut his weekly chores a little short and leave the trash bag by the garage instead of fetching the plastic garbage bin.
In the morning, he discovers that something has gotten into the bag and has spread trash all about. “Was it a bear?” wonders Sylvia. “Too big,” says Daddy. “A mouse?” wonders Sylvia. “Too small,” answers Daddy. “I know,” she says, “it was Trash Fairies!”
While many of you have probably seen reproductions of the World War II “Make Do and Mend” subway posters, “Make Do and Mend” was, more importantly, a pamphlet sent out to British families during the war. Because of shortages of supplies — and because many of the supplies that could get through were needed for soldiers — the British government sent out these pamphlets with ideas to help civilian citizens get every ounce of use out of their clothes and household goods. From underwear made from parachutes to instructions for unraveling and re-knitting sweaters — everything we might think of as “trash” was reused until it was completely worn out — all in support of the troops.
This week’s craft is a good example of making do and mending. It uses something you might throw away — an old pair of socks — and makes it into a new toy for a child.
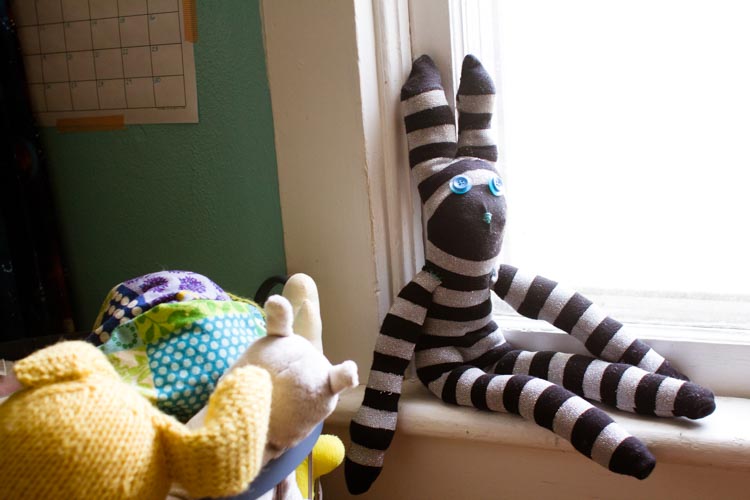
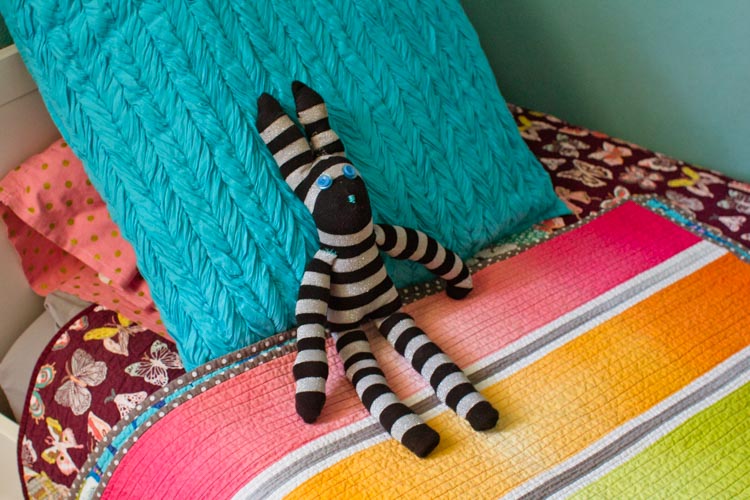
This bunny is not quite the same type of creature as the one Martin and Sylvia find getting into their trash, but — if I do say so myself — it is a lot cuter. It’s a quick project to make for your child and it would also be a great first sewing project for older kids, teaching the principle of not throwing things away that can still be used.
Trash-to-Treasure Sock Bunny
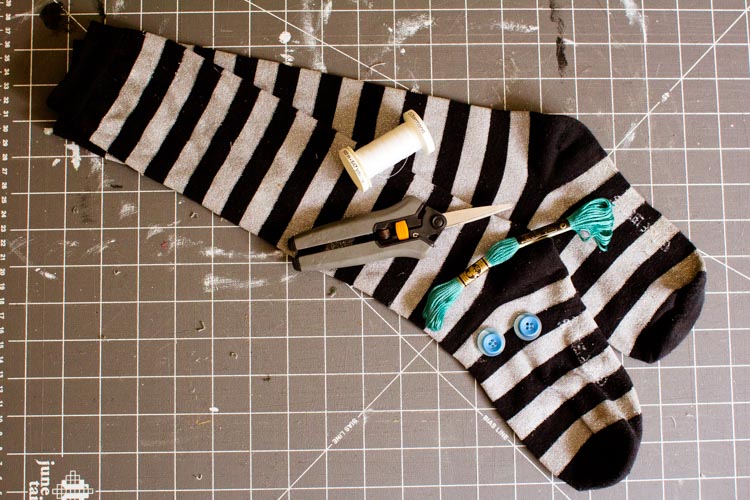
Materials
A long pair of socks
Cutting mat
Scissors or a rotary cutter
Matching thread (I used contrasting thread in the pictures below so you can see it better)
Contrasting embroidery floss
Supplies for hand-sewing or a sewing machine
Stuffing
Chopstick or pencil (for pushing the stuffing into the legs, arms, and ears)
4 buttons (2 small, 2 a bit larger)
Directions
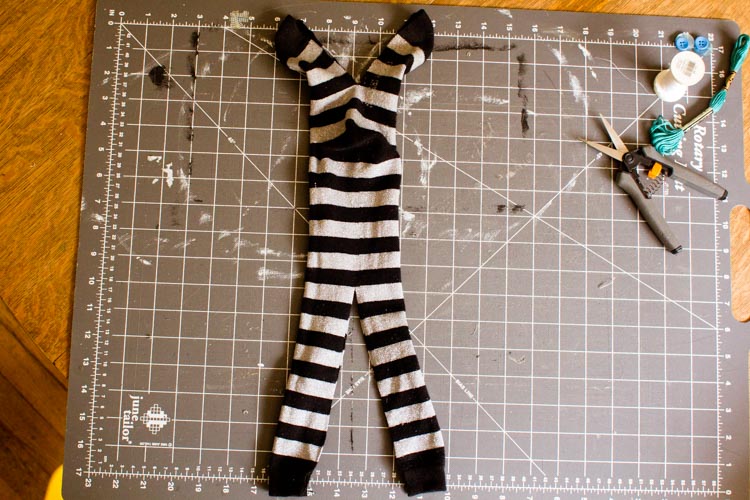
Take one of the socks and lay it out, heel-side up, on the cutting mat in front of you. (To help orient you, the heel will be the finished bunny’s nose.) Using scissors or a rotary cutter, start at the toe of the sock and cut a 3- or 4-inch slit down through both layers of the sock, to make the ears. Then cut a second slit, this time starting at the calf end of the sock and going up about 7 inches. This slit is for the legs.

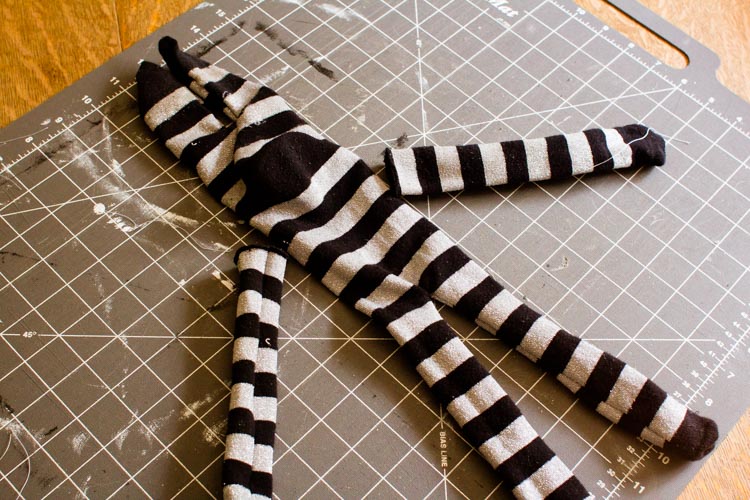
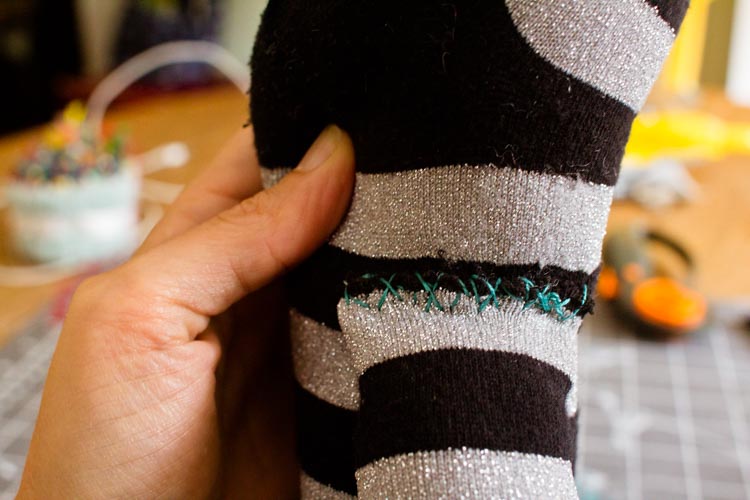
Now, turn the sock inside out and pin together the two layers of each ear and each leg.
Either by hand-sewing or using a machine, sew around the unconnected edges of each ear and leg, being sure to leave a hole at the bottom of one of the legs so that you can stuff the bunny later.
Turn the body of the bunny right-side out and set it aside.
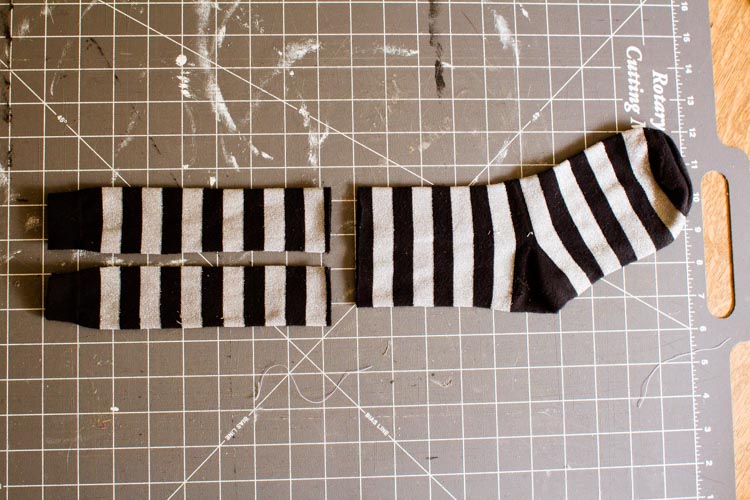
Set the second sock out on the cutting mat. Cut about 7 inches off the cuff of the sock, then cut a slit all the way through both layers of the piece you just cut off. These are the bunny’s arms. (Discard the toe of the sock or save it for another use.)
As you did with the legs and ears, turn the arms inside out. Sew together the unconnected edges, leaving the very top of the arms open for stuffing.
Turn the arms right-side out.
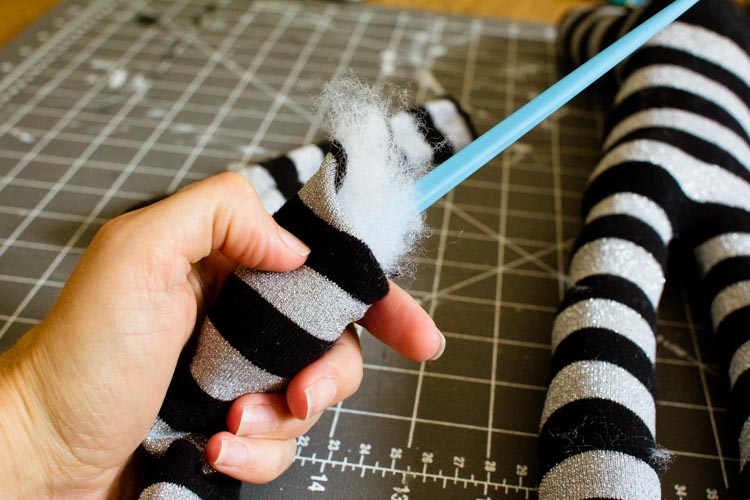
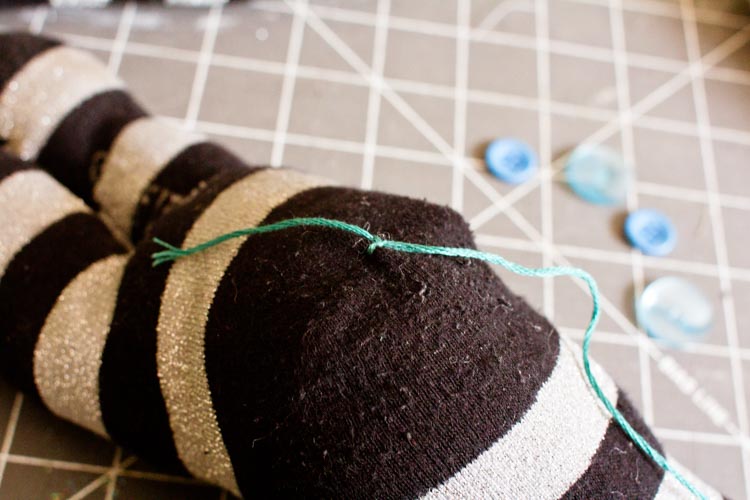
Now it’s time for stuffing. This can be a little tricky, but work patiently and you’ll get there. Roll up the leg that you left open as if you were putting on a pair of hose, then use a chopstick to poke small bits of stuffing up into the ears and body. Continue with the bottom leg, and then onto the second leg. When you’re finished, stitch the second leg closed as neatly as you can.
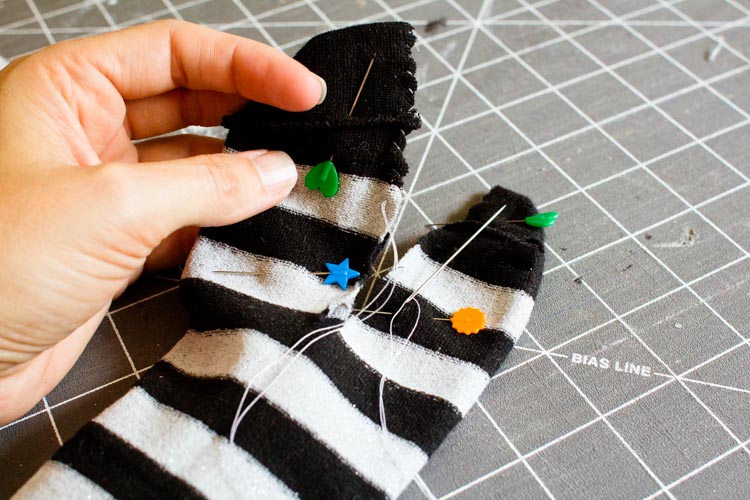
Stuff the arms as well, then pinch them closed at the top — where you left the hole to stuff them — and sew them onto the body.
Now, get a bit of contrasting embroidery floss on your needle and use it to stitch a triangle nose shape right at the pointy part of the bunny’s face.

Lastly, sew on buttons for eyes — I liked the effect of stacking two matching buttons on top of each other — and your former pair of socks will have completed their transformation into a sweet bunny rabbit.
If you liked this tutorial, here are others you might enjoy:
Not yet a subscriber? Try a free trial HERE.
About the authors
-

Meryl Carver-Allmond
Sparkle Kitchen & Craft BloggerThe Sparkle Kitchen Series is created by Meryl Carver-Allmond.
Meryl lives in a hundred-year-old house near the prairie with her sweet husband, two preschoolers, one puppy, one gecko, and about ten chickens. While she’s been writing since she could pick up a pen, in recent years she’s discovered the joy of photography, too. She feels lucky to be able to combine those skills, along with a third passion — showing people that cooking for themselves can be healthy and fun — in her Sparkle Kitchen posts.
