Sparkle Craft: “Speak Out” Postcard Writing Kit
The By Thistle By Thimble story “The Rights of the Lefts” is about a kingdom long ago and far away where the right-handed people were in charge. They ate the best food and enjoyed the best jobs and lived in the best houses.
The left-handed people, however, did not enjoy any of those comforts. No, they lived in the fields, they ate while they worked, and they slept on the ground. But this was how things were — this was how life had been for years and years. Though there were some who didn’t agree, no one spoke up against the king and queen who ruled them.
And then something remarkable happened. The king and queen had twins, and only one of them was right-handed. The other was left-handed, which forced his brother to make an important decision. Should he take his place as the heir? Or speak out about the injustices of his kingdom?
One of my favorite things about my kids’ preschool teacher is that, even though they are little, she encourages the students in her class to speak up and take action when they see something in the world that’s unfair. They’ve written letters to politicians, collected money for charitable causes — you name it. I love how it gives them a sense of agency, of “You — yes, you — can change the world!”
But, goodness, I hate how unprepared I am to help them sometimes! A typical conversation:
“Mom, I want to write a letter about the rainforest. Will you help me?”
“Sure!”
“Where’s the paper?”
“Um….”
“Do we have stamps?”
“Um….”
If you’ve ever found yourself similarly unprepared, this week’s craft is for you. With a few dabs of fabric glue and some very fun, non-technical sewing, you’ll have a nifty kit that’s all prepared the next time you or your little ones need to speak out about an injustice. In fact, this kit is so cute and fun to make that it might even encourage you to speak out more often.
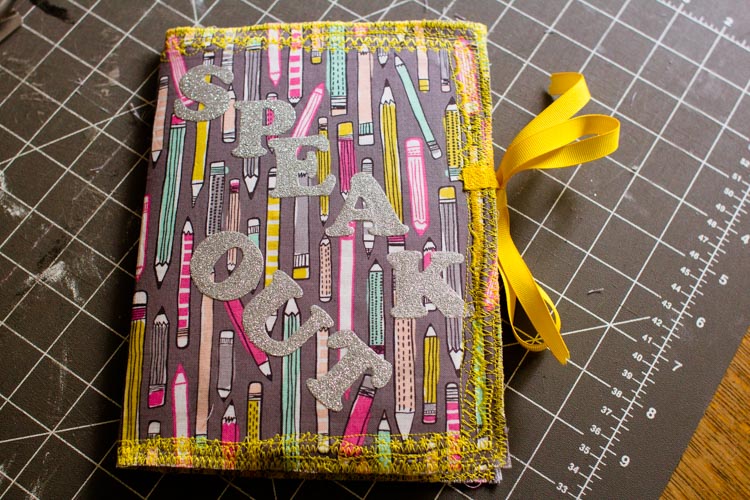
“Speak Out” Postcard Writing Kit

Materials
Large cereal box
Scissors and/or a rotary cutter
Cutting mat
Ruler
⅓ yard fabric
Fabric glue
Small iron-on letters
Iron
½ sheet stiff craft felt (approximately 12-inches by 6-inches; close is good enough)
Contrasting thread
Sewing machine
About 24 inches ½-inch ribbon, cut in half
Postcards, stamps, pens
Directions

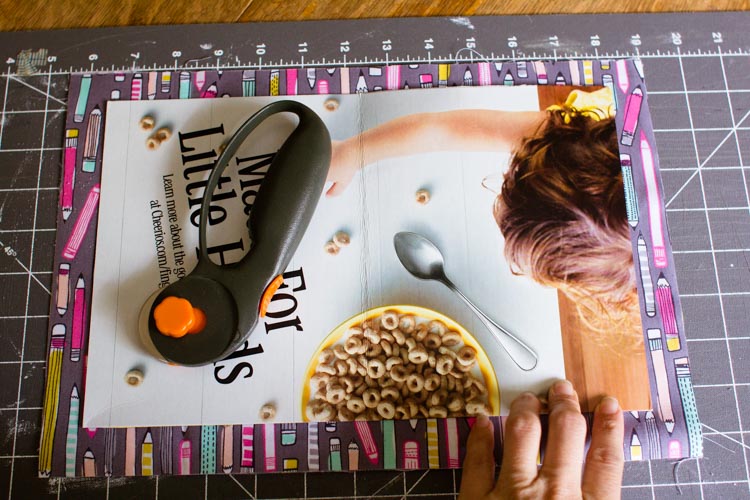
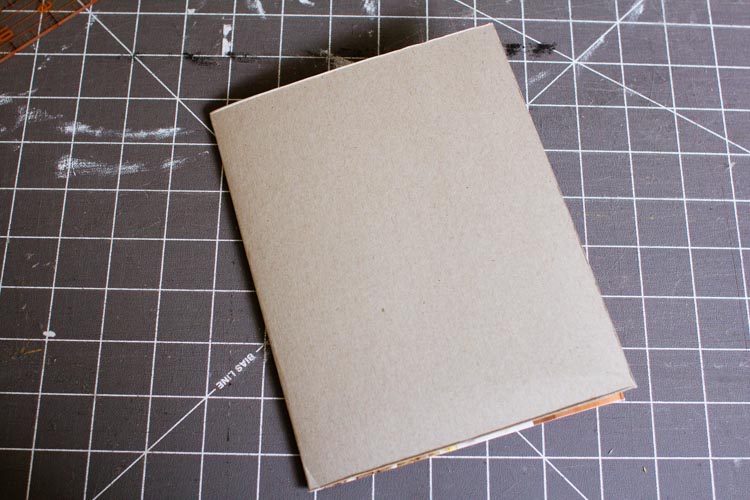
Using your scissors or rotary cutter, cut the front panel off the cereal box. Neaten up the edges so that the front panel of cardboard is square, then recycle the rest of the box.
Working on a cutting mat, lay the cardboard out over two layers of fabric. Use your ruler to cut the fabric so that it’s an inch larger than the cardboard on all sides.
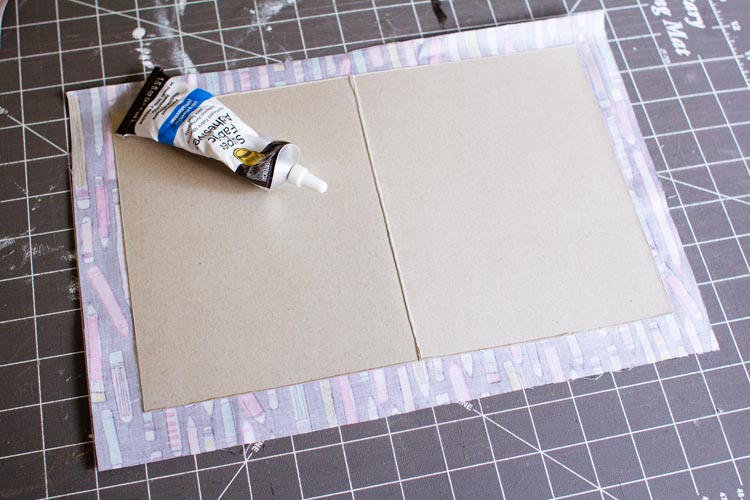
Fold the cardboard perfectly in half, then — working carefully to center up the fabric neatly — use the fabric glue to glue one piece of the fabric you have cut to one side of the cardboard, print side facing out. Smooth out any wrinkles, then set that piece aside to dry.
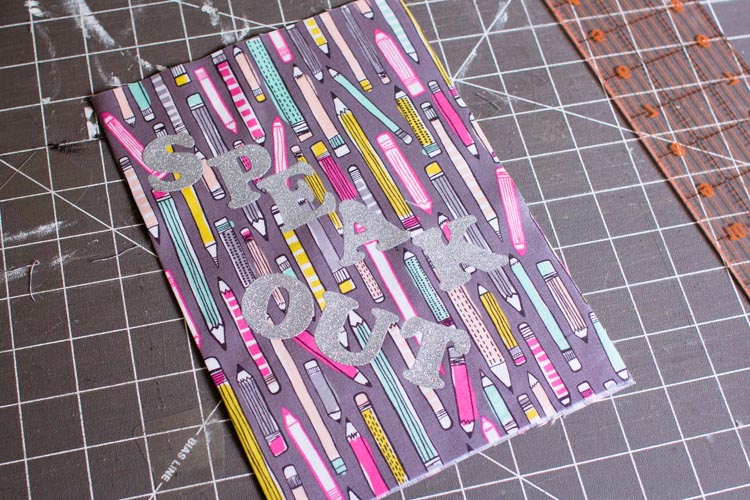
Now, take the second piece of fabric and fold it in half, print side facing out with the folded side on your left. (So, like you’re looking at a book.) Arrange the iron-on letters however you like on the cover, being sure to leave a 1-inch margin on the top, bottom, and right sides. Follow the instructions that will come with the letters to attach them to the front cover.
Next, use the fabric glue to glue the second piece of fabric to the other side of the cardboard, being careful to center up the fabric and get the words on the side that will be the front cover.

Once you’ve done that, cut the craft felt into two rectangles that are each about 6 inches by 4 inches. (They need to be smaller than one side of the book, but large enough to fit your postcards.)
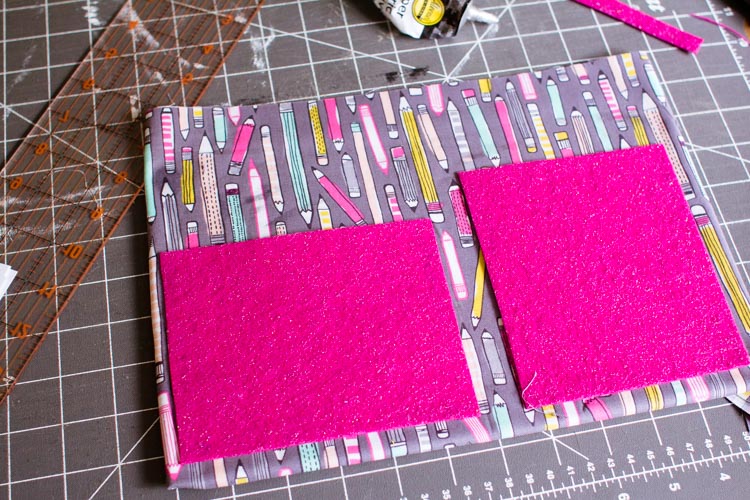
Glue the felt rectangles around three edges and attach them inside the book, leaving the top of each piece open to form a pocket. Let the fabric glue set up for at least 15 minutes.
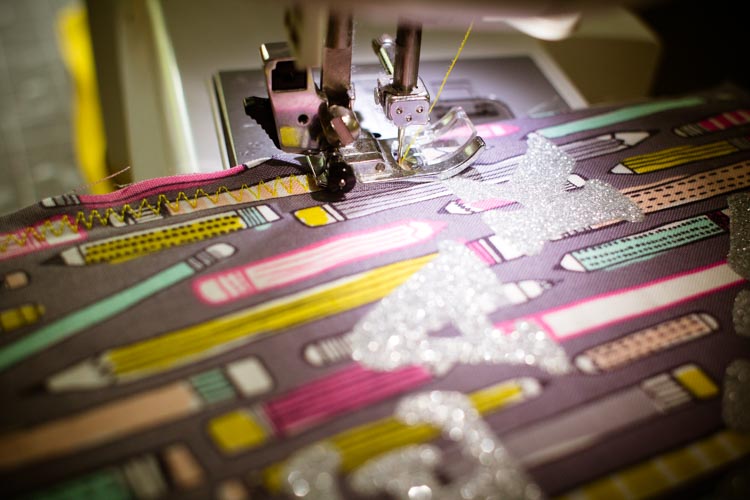
Once the glue is relatively secure, lay the book out flat and use the ruler and rotary cutter to neatly trim the edges to about ½ inch from the cardboard on all sides. Then, load the thread on your sewing machine and go crazy sewing in that ½ inch between the cardboard and the edge of the fabric.
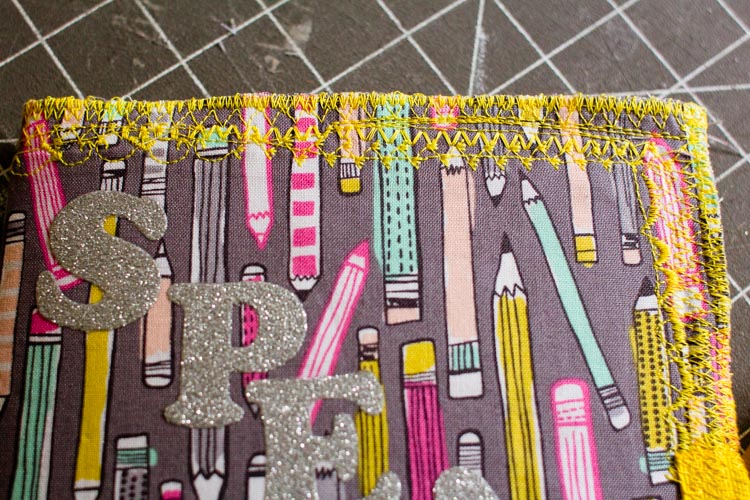
For serious — go crazy! Try out every stitch on your machine. Go back and forth between the stitches you like. I circled around this book at least 10 times, and used every stitch I could use without changing the sewing machine foot. The only two tips I have are 1) be careful so that you don’t sew the corners down, and 2) if you run a fairly tight zig-zag stitch around the very edge, it will help contain any fraying. Other than that, just have fun.
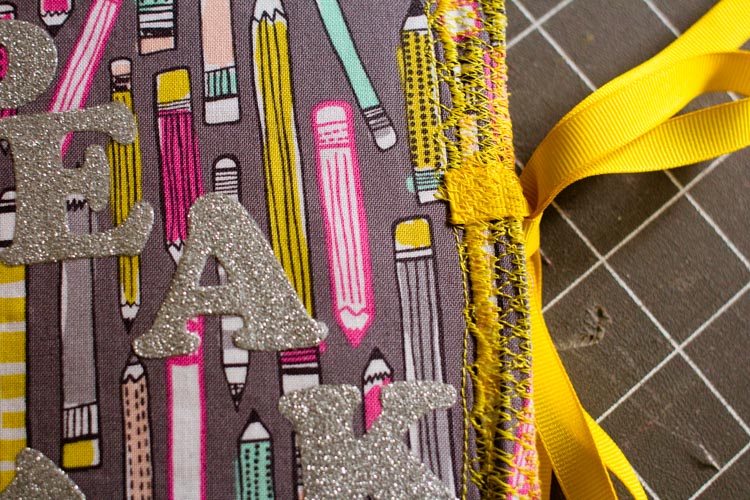
When the edge is full of stitching and starting to feel stiff, attach the ribbons about two-thirds of the way up on each side of the book by catching the ends of the ribbon in your final few rounds of stitching.
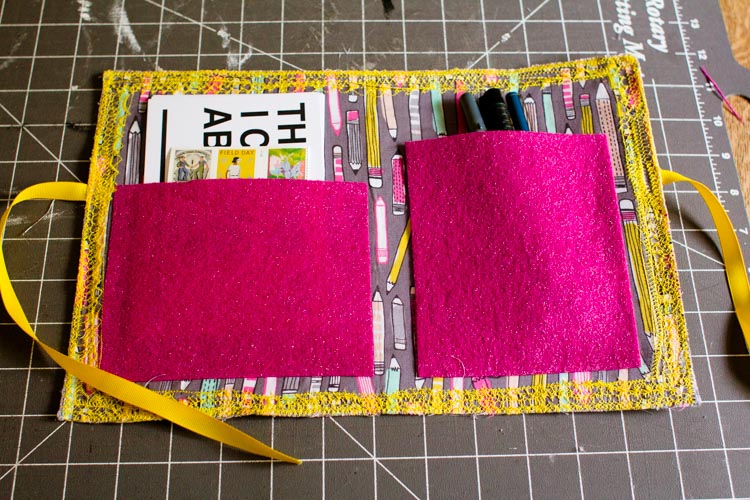
Then, load your booklet up with postcards, stamps, and pens, and put it somewhere handy for the next time you need to speak out.
If you liked this tutorial, here are others you might enjoy:
Not yet a subscriber? Try a free trial HERE.
About the authors
-

Meryl Carver-Allmond
Sparkle Kitchen & Craft BloggerThe Sparkle Kitchen Series is created by Meryl Carver-Allmond.
Meryl lives in a hundred-year-old house near the prairie with her sweet husband, two preschoolers, one puppy, one gecko, and about ten chickens. While she’s been writing since she could pick up a pen, in recent years she’s discovered the joy of photography, too. She feels lucky to be able to combine those skills, along with a third passion — showing people that cooking for themselves can be healthy and fun — in her Sparkle Kitchen posts.
