Build Sponge Sprout Houses
In this week’s So Many Fairies story, “Whisp Tells a Story”, Paul’s father has some difficult news: his mother has to spend a while in the hospital. But, as Paul’s father tries to tell the children what to expect, Paul keeps looking around the room, smiling. The fact is, Paul is looking at Whisp, the house fairy.
If you’ve listened, you’ll know that Whisp helps Paul understand his mother’s illness by telling a beautiful story about Aileen, a water nymph, who decides to find out what it’s like to live and die as a flower.“The fairy world is so wide, so tall, and it spreads in all directions.It is so much bigger than your world, Paul,” Whisp begins.
And so it is.While part of fairy magic is made possible by faith and trust in the unseen, I can’t help but think I’m getting a glimpse of it each spring as I watch the tiny seeds I plant in my garden grow from what feels like minuscule grains of sand into the flowers and vegetables that fill our hearts and bellies.
This week’s ‘Sponge Sprout Houses’ craft project makes that process a little easier to observe up close.
Growing sprouts inside is a quick, easy way to get fresh micro-greens with almost no space.And, by using quick sprouting seeds like radish, arugula, and kale, you’ll get very quick germination.Even if you think you have a black thumb, give it a try.The seeds want to grow, I promise!
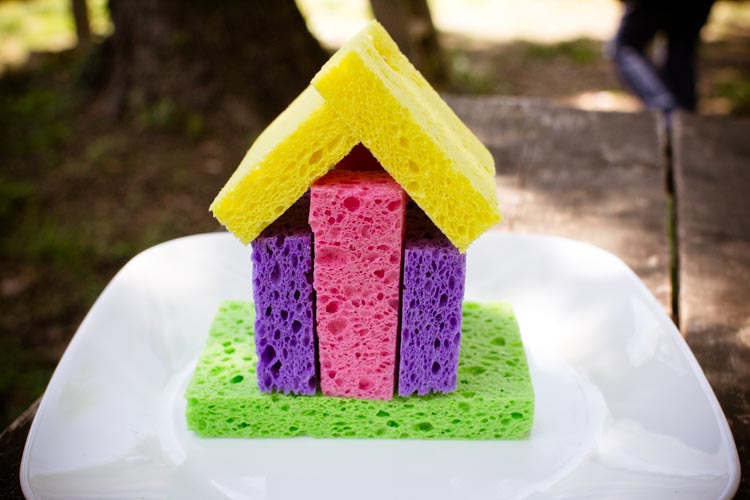
While you can absolutely sprout seeds on flat sponges, designing and building little sponge sprout houses for them is a fun way to get the kiddos involved and excited, too. The more flat spaces you can add to your house, the better, but I was surprised that we had seeds growing in the dark interior of our house, as well as on the outside where I expected them.Again, it’s a bit magic how the seeds really just know how to grow.
Have fun watching them, as you try this out!
Sponge Sprout Houses

Several kitchen sponges
Toothpicks
Scissors
Packet of radish (or other quick sprouting) seeds
Spray bottle
Plastic baggie, plastic bag, or clear plastic container
Directions
Begin by wetting each sponge throughly, and then wringing it out.The sponges should be damp, but not dripping.

Then, using one sponge as a base, cut the other sponges to your desired size to make walls, a roof, and a door to your house, as desired.
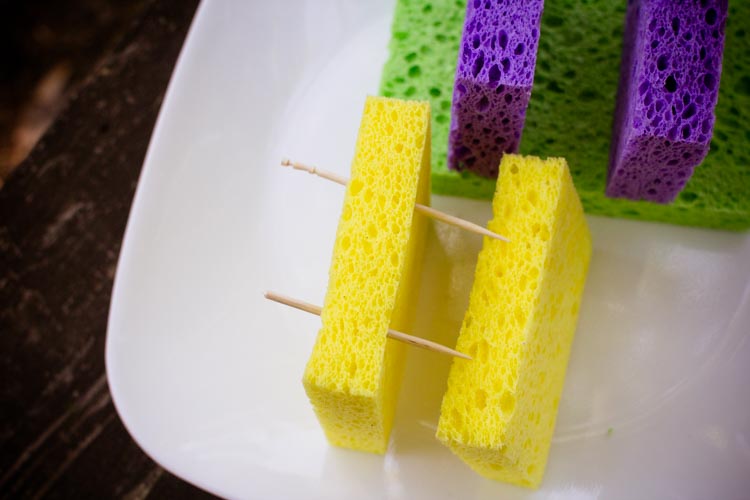
Use the toothpicks (an adult may have to help push them through the sponges) to provide architectural support as needed.
Snip off any sharp toothpick ends with the scissors.
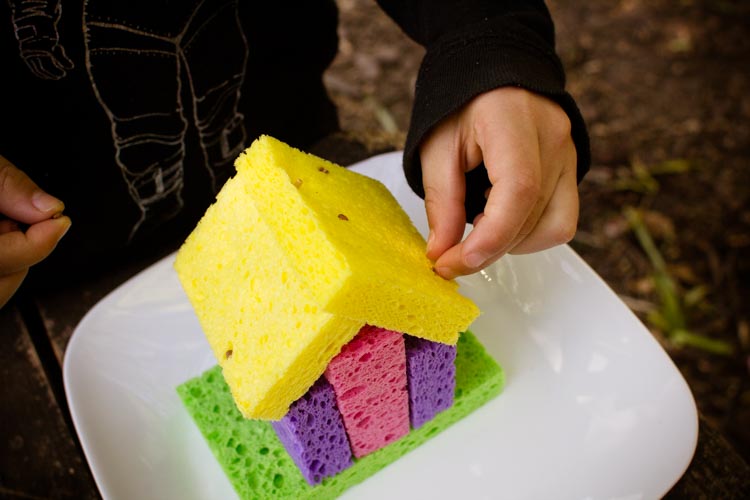
Once your house is built, begin tucking radish seeds into the tiny holes in the sponges.
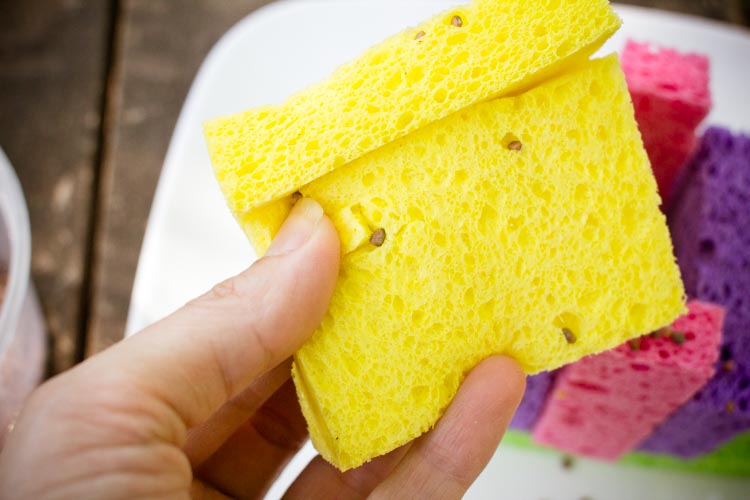
If you’re having trouble getting them to stay—we had trouble on our slanted roof—use the scissors to cut small “X” shapes into the sponges and poke the seeds down into the slits.

When you’re finished planting, put your sprout house in a warm, sunny spot.Spray it daily to keep it moist, covering it loosely with a plastic bag, plastic wrap, or a plastic container if it dries out too quickly.Depending on how warm it is, you should begin to see seeds sprouting in anywhere from 3-10 days.

Once the seeds have leaves, snip a few off for a taste.Are they spicy?Do they taste green?Try them sprinkled over a salad or sandwich, or continue to let them grow and enjoy your tiny, sprouting fairy house.
If you liked this tutorial, here are others you might enjoy:
Not yet a subscriber? Try a free trial HERE.
About the authors
-

Meryl Carver-Allmond
Sparkle Kitchen & Craft BloggerThe Sparkle Kitchen Series is created by Meryl Carver-Allmond.
Meryl lives in a hundred-year-old house near the prairie with her sweet husband, two preschoolers, one puppy, one gecko, and about ten chickens. While she’s been writing since she could pick up a pen, in recent years she’s discovered the joy of photography, too. She feels lucky to be able to combine those skills, along with a third passion — showing people that cooking for themselves can be healthy and fun — in her Sparkle Kitchen posts.