Sparkle Craft: Recycled Castle
In this week’s By Thistle By Thimble story, “Tibby and the Fifth Virtue,” Tibby loves books. All day long he reads books about knights, warriors, and the code of chivalry, often to the detriment of keeping his spaces tidy or paying attention to others.
One day he is surprised to find a book in his school locker called “The Fifth Virtue.” Where did the book come from? And could it be that this book — about a knight named “Sir Timothy” — is really about himself?
I’m sure Tibby isn’t the only child who would rather read a knightly tale than clean his room. (Come to think of it, I would too!) But because, as Tibby learns, a bit of balance between the two is good, this week’s craft project lets you do both.
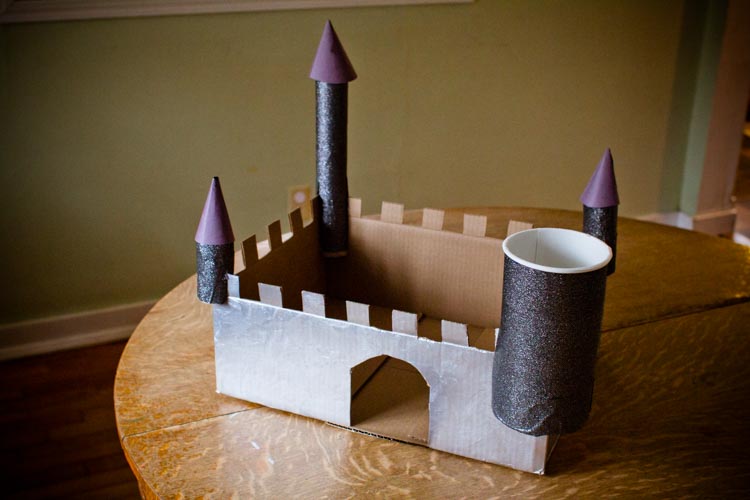
Not only is this castle fit for gallant deeds and brave adventures, it is also mostly made out of things you would otherwise throw away. Beginning with a box and a few empty cardboard tubes — and adding in some adult help with a box cutting knife — this is a castle King Arthur would be proud of.
You can use either paint or duct tape to make the castle grey, or you can mix it up and use a little of both. (For our castle, we used paint on the main part of the castle and special glitter duct tape for the towers.) You could also draw rocks, bricks, or moss on the castle walls to add a bit of whimsy.
Whatever architectural and artistic decisions you make, you’ll end up with a fun playscape, fit for all sorts of courtly imaginings.
Recycled Castle
Materials
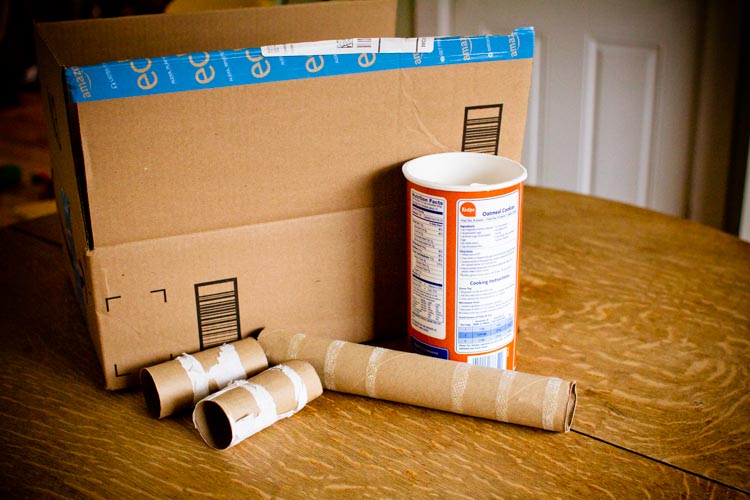
1 medium-sized box, with the flaps for the lid still attached
Four paper towel rolls, toilet paper rolls, empty oatmeal canisters, or other cardboard tubes
Craft paint and/or duct tape
A ruler
A box cutting knife
A black marker
Several sheets construction paper
Scissors
Tape or glue
Directions
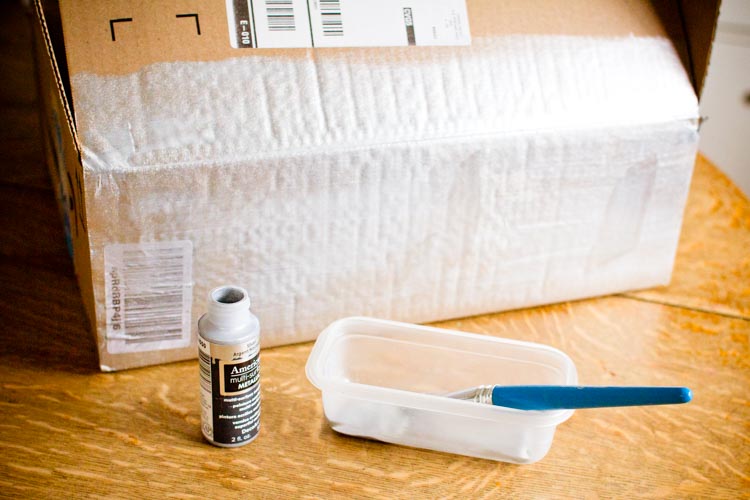
As much as possible, remove any tape or shipping labels from the box. Then, either paint the box (you’ll need to do two coats) or cover it with duct tape. You only need to cover a few inches above where the lid flaps fold over, as you’ll shortly be cutting the rest off.
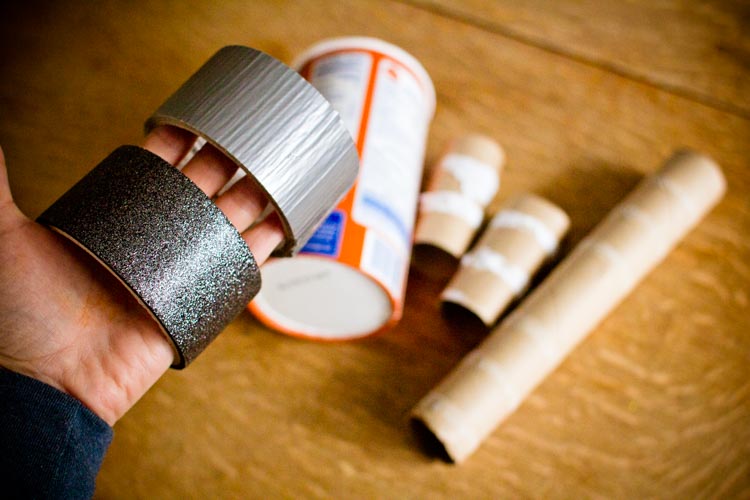
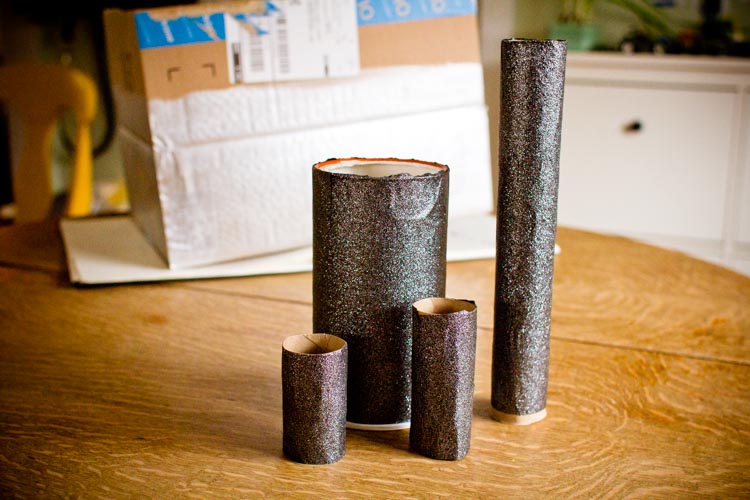
Give the cardboard tubes the same treatment—picking off any bits of paper and covering them with paint or duct tape—only you need to cover them completely.
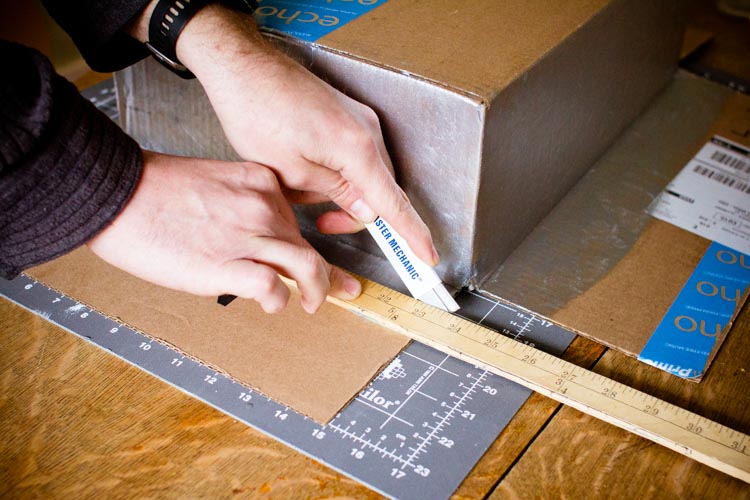
Once any paint you used is dry, turn the box on its side, and use a ruler and a box cutting knife to cut the lid flaps down to about two inches.
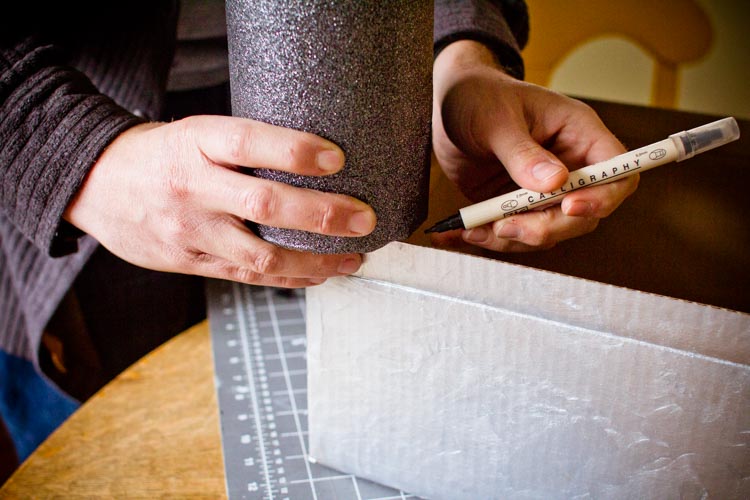
Then, decide which cardboard tube “tower” is going to go on each corner. Center each tower on its designated corner, and use a marker to mark each tower’s dimensions on the inside of the box.
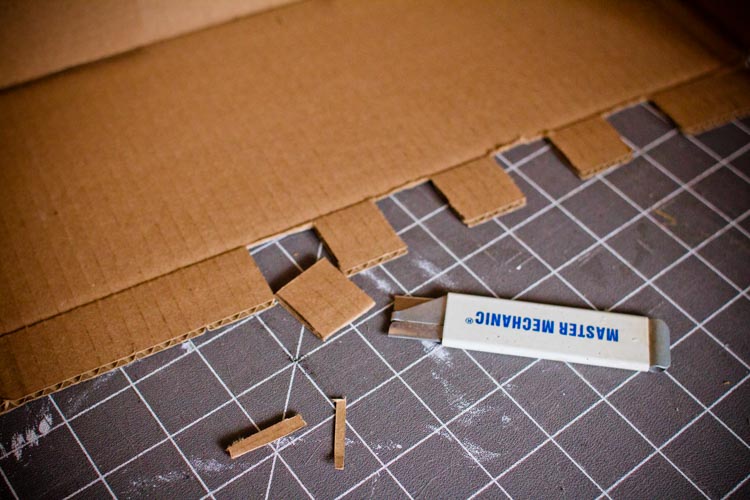
Using one end of the ruler as a spacing guide, cut squares out of the remaining lengths of lid flaps to make the battlements. Do not cut battlements in the spaces you’ve marked for your towers.
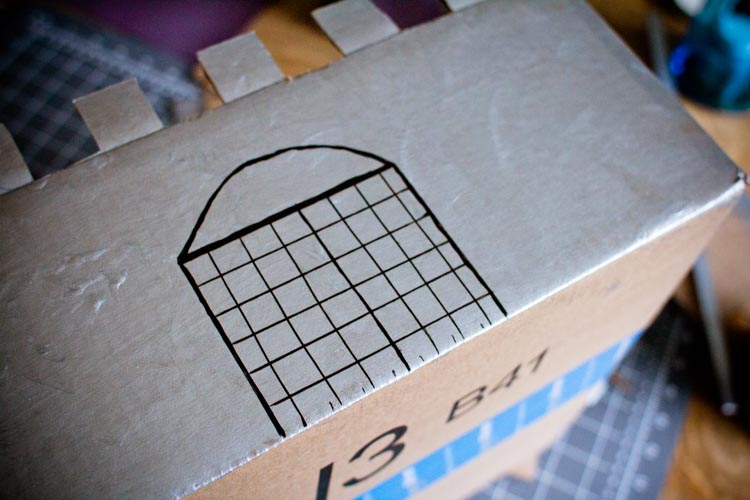
Next, decide which side of your castle will be the front. Use the marker to draw a door, then use the box cutting knife to cut around the sides of the door. Leave the bottom of the door attached, so that the door can open and close.
Once the battlements and door are cut, use the box cutting knife to cut two slits about half way up each tower where the castle walls will go. Use the slits to slide the towers down onto the walls at each corner.
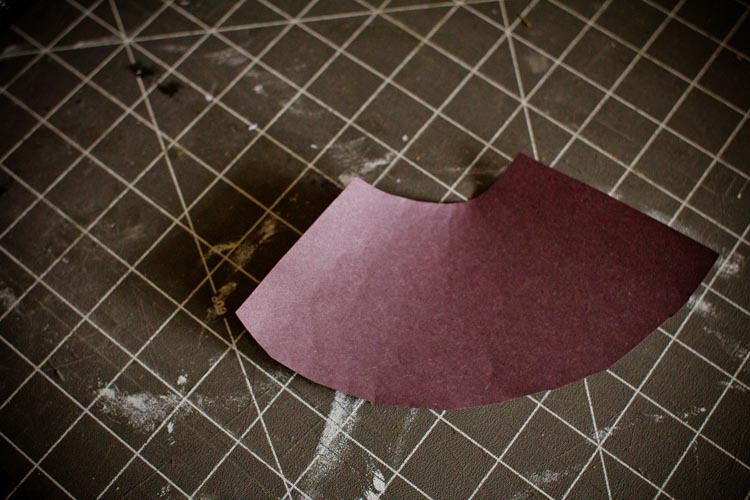
Next, cut four triangle shapes out of the construction paper.These will be the roofs for your towers, so the exact size needed will depend on what kind of recycled cardboard tubes you have used.Round the top and bottom of each triangle (see picture), and roll the triangle into a cone.
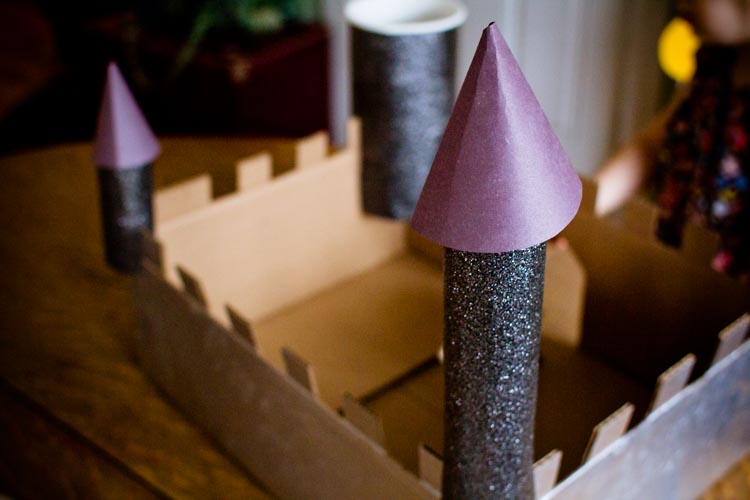
Secure the cone with glue or tape, and glue each one to a tower to make a pointed roof.
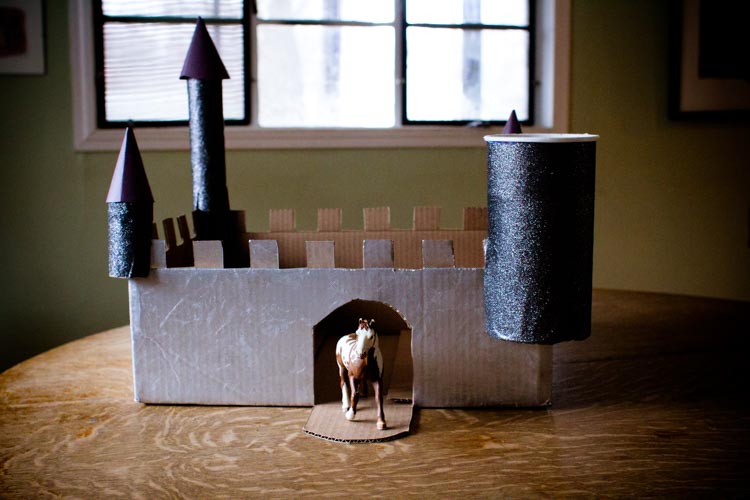
Congratulations, fair knight, your castle is now complete and ready for adventures!
If you liked this craft, here are others you might enjoy:
Not yet a subscriber? Try a free trial HERE.
About the authors
-

Meryl Carver-Allmond
Sparkle Kitchen & Craft BloggerThe Sparkle Kitchen Series is created by Meryl Carver-Allmond.
Meryl lives in a hundred-year-old house near the prairie with her sweet husband, two preschoolers, one puppy, one gecko, and about ten chickens. While she’s been writing since she could pick up a pen, in recent years she’s discovered the joy of photography, too. She feels lucky to be able to combine those skills, along with a third passion — showing people that cooking for themselves can be healthy and fun — in her Sparkle Kitchen posts.
