Sparkle Craft: Recycled Paper Mache Scarecrow
In the Martin & Sylvia story “Gargoyles,” during a trip into town, Martin sees a crew of workers installing some big, stone, goblin-looking sculptures on the front of Town Hall. He learns that long ago the stone goblins, which are called gargoyles, were often placed on buildings to ward off anything scary. Martin thinks that a gargoyle might be just the thing to help protect him from his new fear of noises in the night.
Standing in a field of corn, keeping away intruders, scarecrows are the gargoyles of autumn harvest.
While it’s not at all historically accurate to claim them as “American” — scarecrows were used thousands of years before George Washington was a baby in diapers — they have certainly become part of American culture. Whether you credit L. Frank Baum’s lovable companion to Dorothy, or the German immigrants who brought “bootzamon” (bogeymen) with them from their homeland, or the Native American Zuni children who were having scarecrow making contests long before that — like many other American things, our scarecrow tradition is a mosaic of people bringing their cultures together.
If you’d like to continue that tradition with a scarecrow of your own, give this recycled scarecrow a try.
This is a great project to start on a bright Saturday morning, because — while the active work time is about 45 minutes — you’ll need time to let your scarecrow’s head dry between coats of glue and paint.
Don’t feel like you have to use straw to stuff him, if that’s something you wouldn’t normally buy.Instead, look around for other materials — in the paper shred bin at your office, perhaps — that you can collect and recycle.
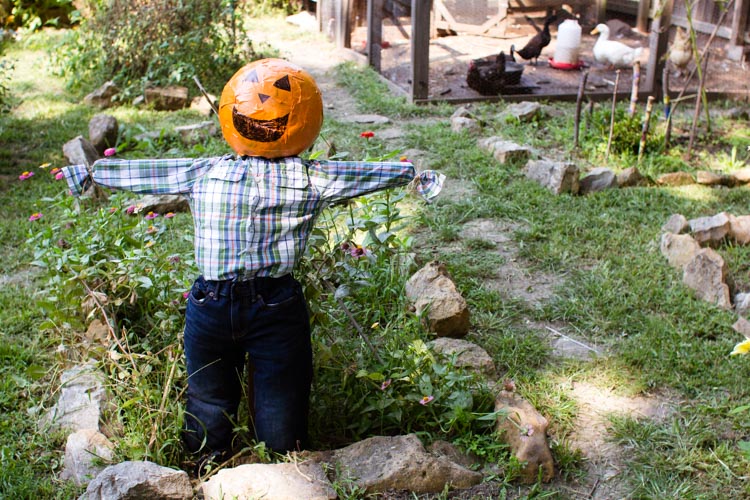
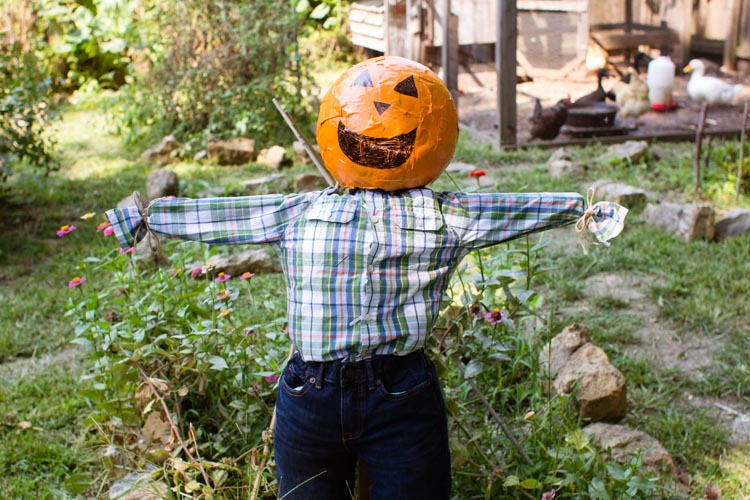
Also, while I did photograph our scarecrow in the middle of our exposed garden, if you really want this scarecrow to hold up, he or she will do better just a little bit protected from the elements. I’ve put ours up more permanently on our front porch to (hopefully) terrify our neighborhood squirrels away from our decorative autumn pumpkins!
Recycled Paper Mache Scarecrow
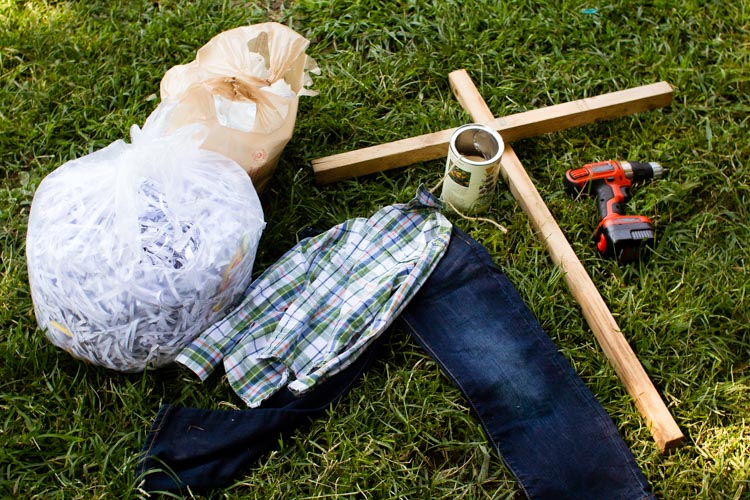
Materials
1 medium balloon
Tape
2 small tupperware-like containers (one for mixing glue, one taller one to prop the balloon on while you glue and paint)
Glue or Mod Podge
Paint brush
Newspaper scraps or paper shreds
Orange craft paint
Black sharpie marker
2 tall garden stakes (about 4-5 feet long each)
A drill
3-4 screws
Garden twine
An outgrown button-down shirt and pair of jeans
Stuffing material (shredded paper, straw, and leaves are all fine choices)
3-4 safety pins
Directions
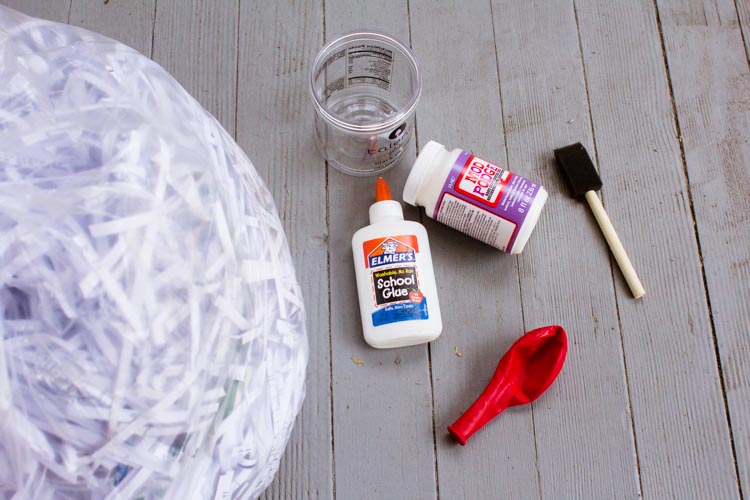
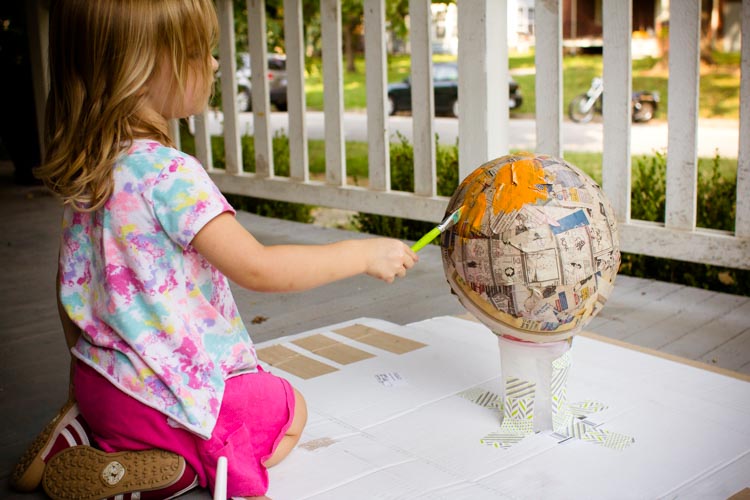
Blow up the balloon, and tape it (knot end down) to a tall tupperware container.
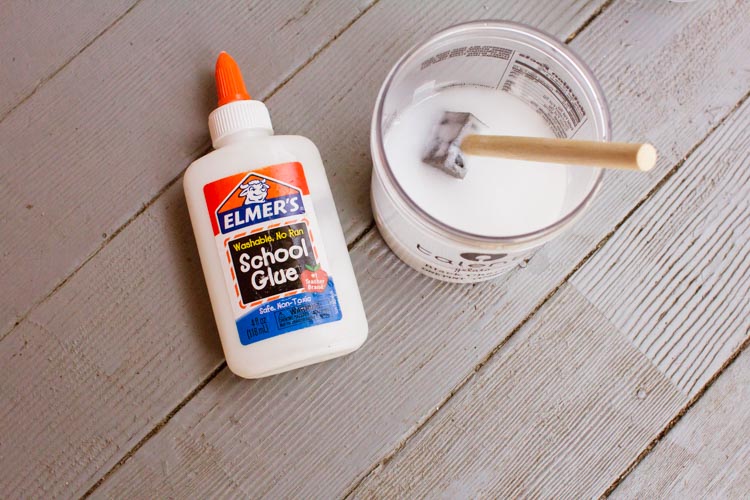
Use a second container to mix the glue with water. No need to pull out a measuring cup to be exact, but you want the glue to water ratio to be about 2 to 1.
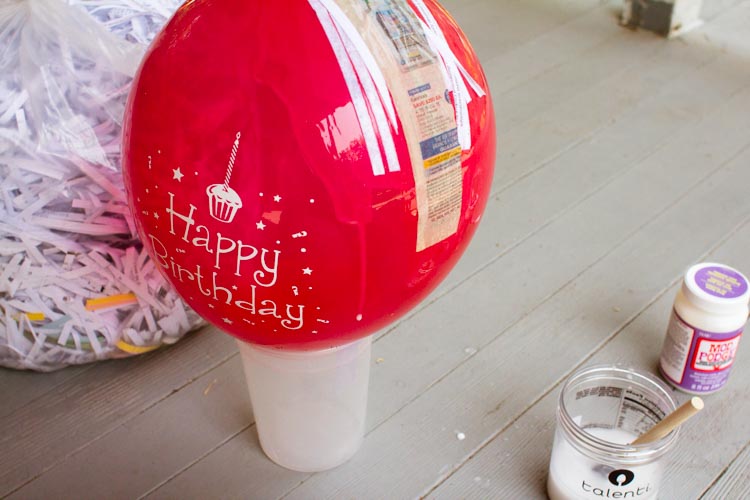
Now paint a section of the balloon with glue, and cover the glue with a strip of paper.
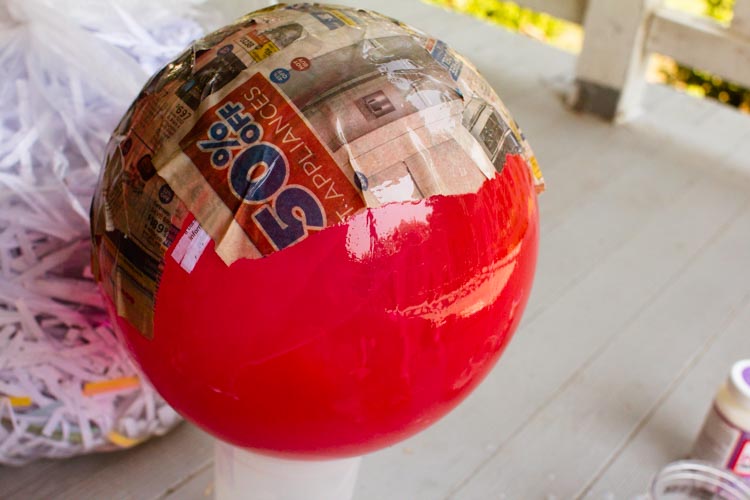
Continue working in this manner — layering the paper over itself to make at least 3-4 layers — until the balloon is covered. (You won’t need to worry about the bottom of the balloon, where the knot is, because you’ll need a hole there to attach the scarecrow’s head to its body anyway.)
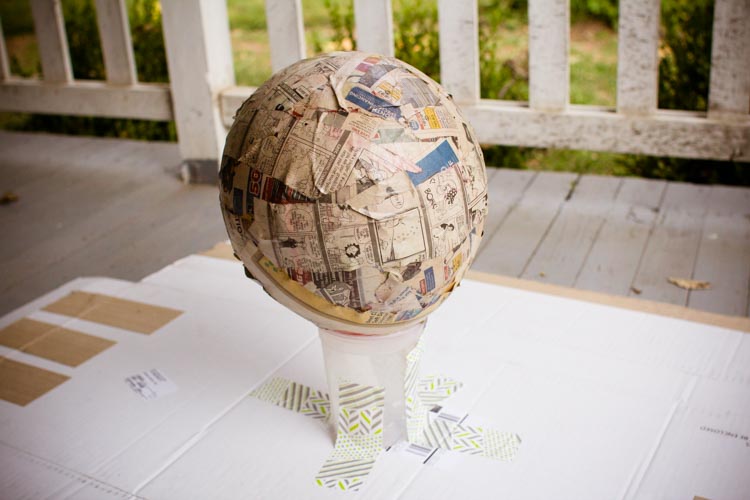
Leave the balloon to dry for a few hours.
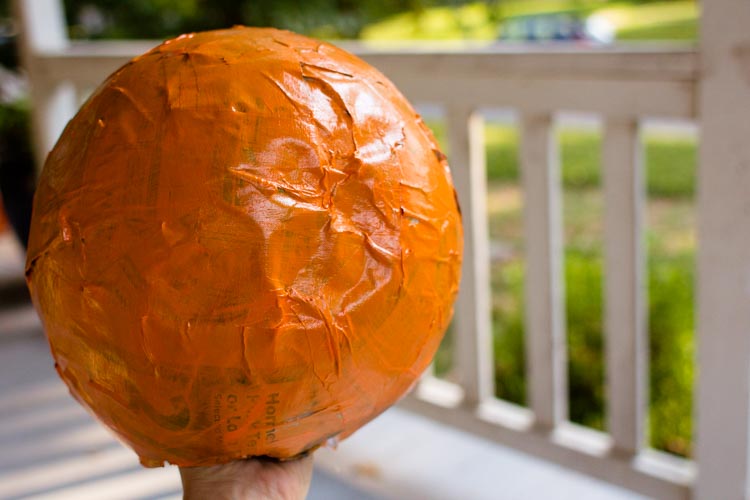
Once the balloon is dry, paint it with orange craft paint. If you don’t mind the rustic look of a bit of newsprint peeking through, two quick coats should do it. If you want your scarecrow’s head completely orange, consider getting two bottles of paint and doing a third or even fourth coat. Leave the balloon to dry for a few hours.

Now it’s time to draw on the face. Use a sharpie to make the expression as scary or funny as you like.
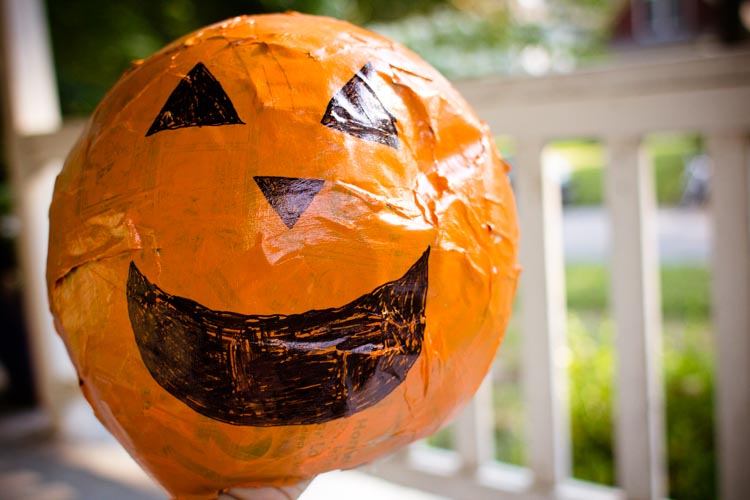
You can now pop the balloon and carefully remove it from inside the head cavity. Then, set the face aside to work on the body.
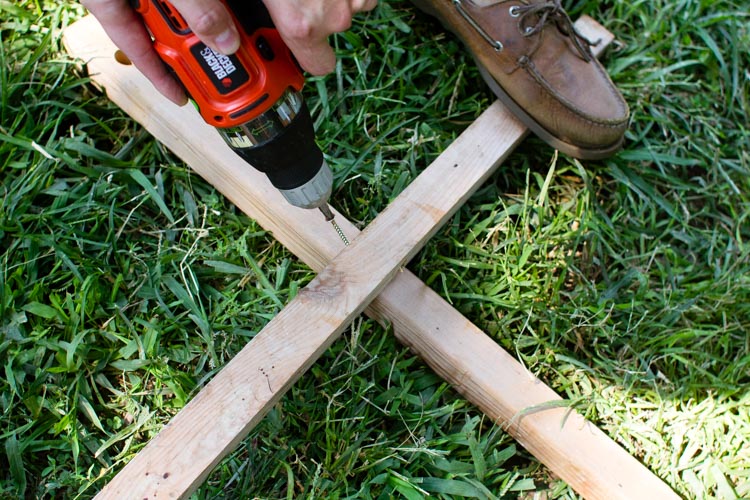
To start the body, screw together two garden stakes to make a “t” shape.
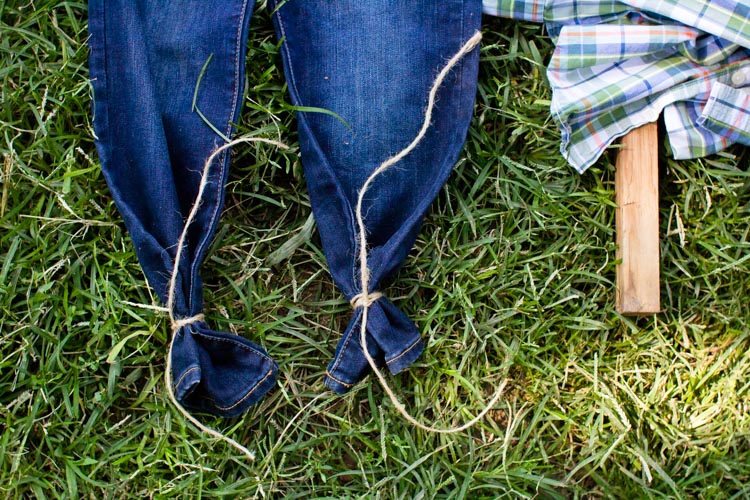
Next, use the garden twine to tie the ankles of the jeans closed.
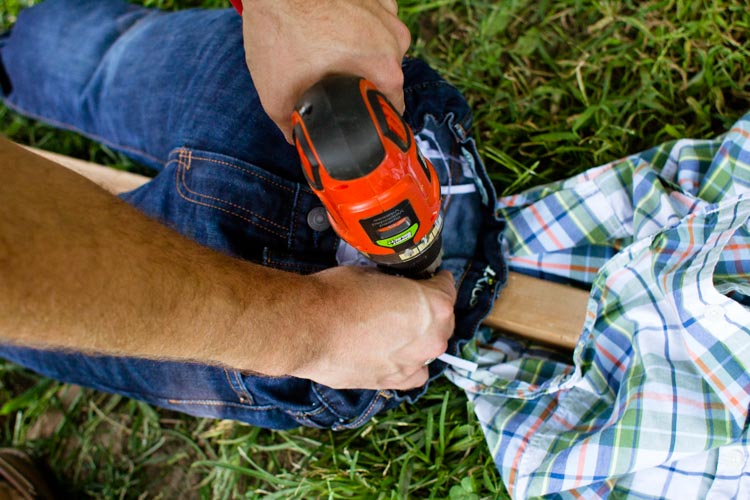
Stuff the jeans with your chosen stuffing material, then use a screw to attach the back waistband about halfway up the garden stake “t”.
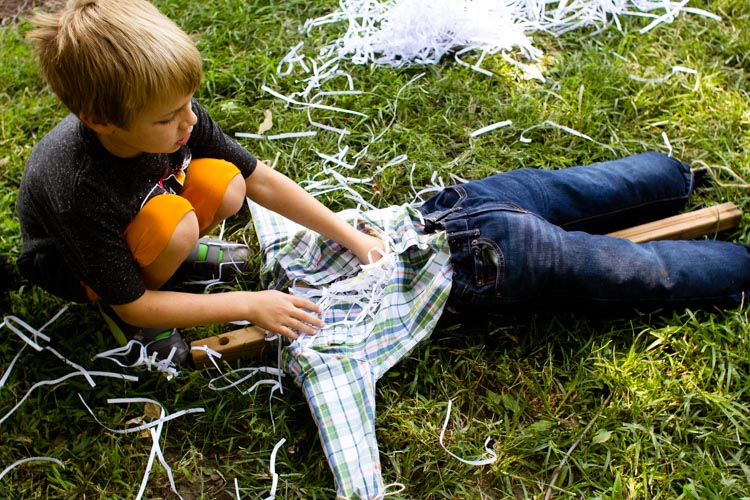
Put the arms of the shirt onto the “t” and use twine to tie them at the cuffs, if needed. Then, button the shirt partway up and tuck it into the waistband of the jeans, securing it with a few safety pins.Stuff the shirt from the neck, buttoning the rest of the buttons as you go.
Last, take your scarecrow body and push the bottom of the garden stake into the ground or a large pot filled with dirt. Retrieve the scarecrow’s head and plop it onto the top of the “neck,” then prop your fine, recycled scarecrow up for the world (and hopefully a few crows and squirrels!) to see.
If you liked this tutorial, here are others you might enjoy:
Not yet a subscriber? Try a free trial HERE.
About the authors
-

Meryl Carver-Allmond
Sparkle Kitchen & Craft BloggerThe Sparkle Kitchen Series is created by Meryl Carver-Allmond.
Meryl lives in a hundred-year-old house near the prairie with her sweet husband, two preschoolers, one puppy, one gecko, and about ten chickens. While she’s been writing since she could pick up a pen, in recent years she’s discovered the joy of photography, too. She feels lucky to be able to combine those skills, along with a third passion — showing people that cooking for themselves can be healthy and fun — in her Sparkle Kitchen posts.
